Sawing out the future backs from a raw plank is always fun as you search for the nicest grain formations and work with the pattern and pencil to map out the most attractive backs. This wood is so beautiful and so valuable that you don't want to make many mistakes.
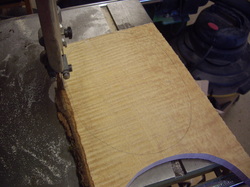
I am making a little progress each day on the pinecones. Here I am band sawing out one of the backs cut from that big board. I will want to make one side of this perfectly flat . That flat side will eventually be glued to the tentalones closing in the body of the instrument. The other side I will leave rough and unfinished as it will be shaped into the curved outside of the instrument back.
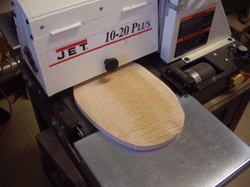
Here it goes, into the thickness sander. After repeated passes this back and the other two as well are perfectly flat on one side, A bit rough on the other.
A thickness sander is a wonderful tool in a luthier's shop. You can do all this with a plane and sand paper but boy this is a lot easier and a lot quicker.
A thickness sander is a wonderful tool in a luthier's shop. You can do all this with a plane and sand paper but boy this is a lot easier and a lot quicker.
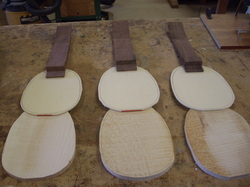
Now we have assembled three of the four essential parts, the necks, the top or soundboard and the backs.
I will begin with the Sound boards, first cutting the sound hole in the thick spruce. Next I will thin them down to .90 on the thickness sander. and sanding them even smoother and thinner with 220 sandpaper and a hand block.
I will begin with the Sound boards, first cutting the sound hole in the thick spruce. Next I will thin them down to .90 on the thickness sander. and sanding them even smoother and thinner with 220 sandpaper and a hand block.
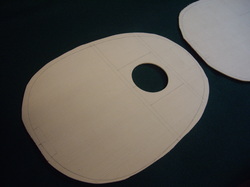
And here are the tops, thinned to working thickness, The brace locations and outer shape sketched on lightly with pencil. Next step will be carving the braces and glueing them on. I think tomorrow I will cut out the tiger stripe maple sides first. Maybe I will even bend them tomorrow. Stay tuned.
