I knew this would be a full day of making and attaching the tentalones to the three concert "Pinecones" I am building. I also knew that I was tired of standing at the bandsaw trying to saw perfect tentalones guaging where to cut by eye-ball.
Last night I sat down with pencil and paper and tried to draw out a jig that would allow the basswood stock to slide along in a controlled "trough" and be stopped at a controlled interval by a device that would index with the last cut made. I drew up several ideas, had a little bourbon to help the imagination, and finally came up with an idea I thought would work.
This morning, using wood scraps I had in the shop, I cobbled together the Tentalone Notcher shown below.
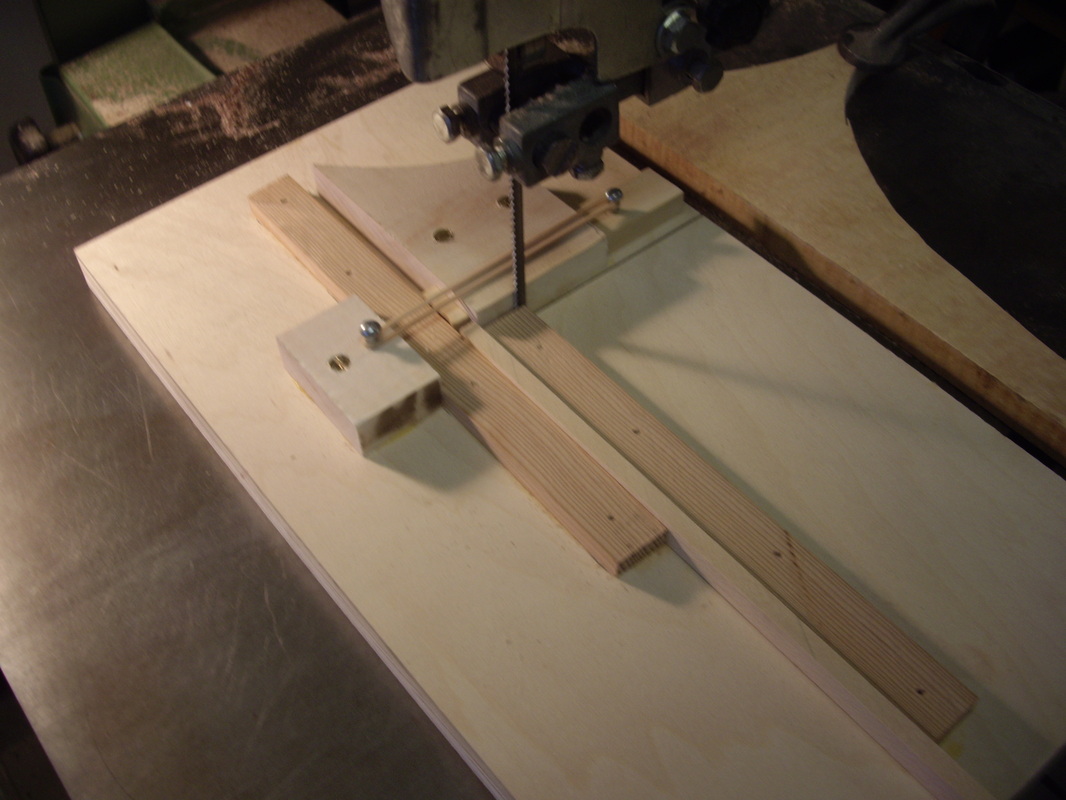
The plywood base plate is a sled guided by the groove in the band saw table. the wooden guide is lubricated with floor wax and slides well.
The stop is clamped to the saw table and stops the blade just before it can sever the tentalone stock.
A box wood bolt slides back and forth in its groove cut in the maple piece shown with two screws. On that hard boxwood is carved a very slight V shaped protusion that registers with the last cut in the tenalone, stopping the stock for the next cut.
The Box wood bolt is powered by two thin rubber bands which exert just the right amount of pressure on the bolt.
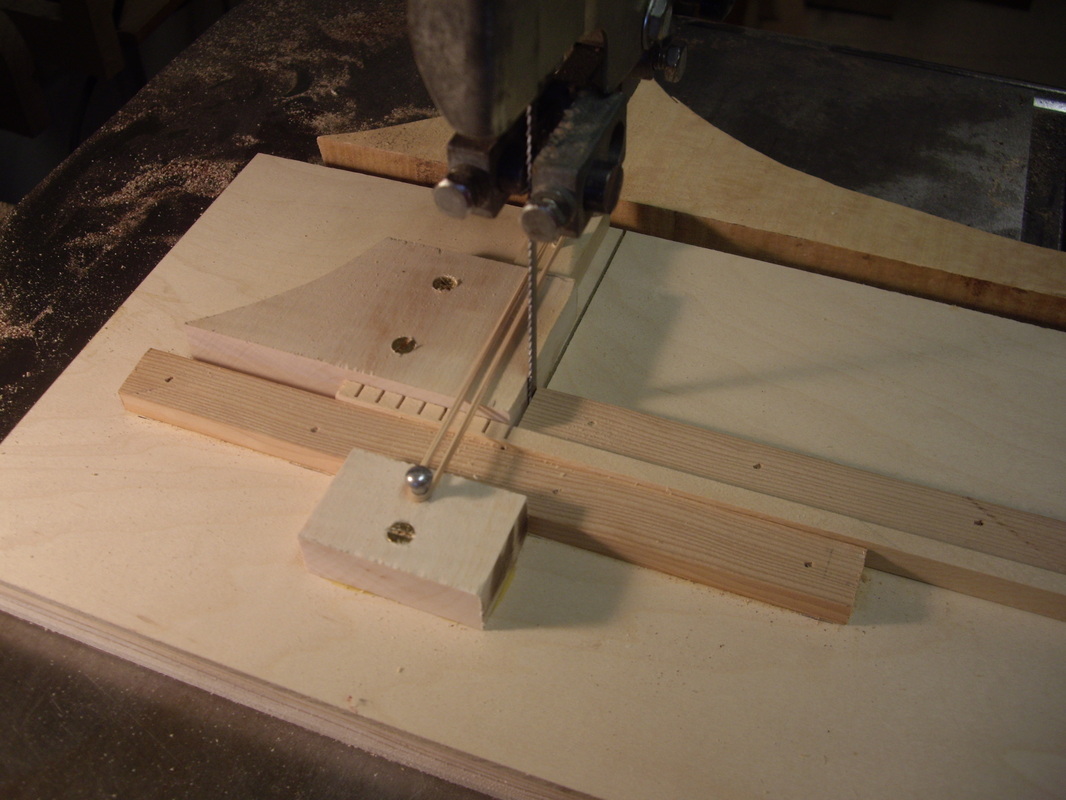
AND WHADDIYA KNOW, IT WORKS! the tentalone in its channel slides along and is stopped by the V on the bolt. You slide the sled and cut the first notch, then pull the bolt back by its screw handle to set the V in the first cut. Thereafter you just gently push or pull the tentalone to the next stop, push the sled and you have another cut made. Works like a charm. I had to fiddle with the right number of rubber bands, make the V a bit smaller and sand it smooth, then a little floor wax applied to the bolt and the V as well as the guide running in the saw table. It worked slick as can be.
The V enters the last saw cut just to the left of where the blade is. There is a tiny pencil mark seen at that point.
The V enters the last saw cut just to the left of where the blade is. There is a tiny pencil mark seen at that point.
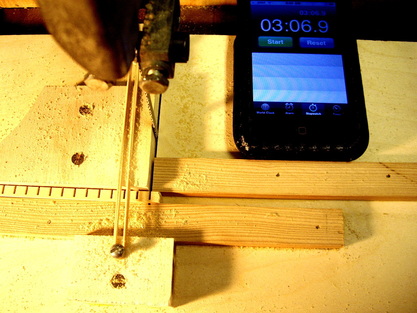
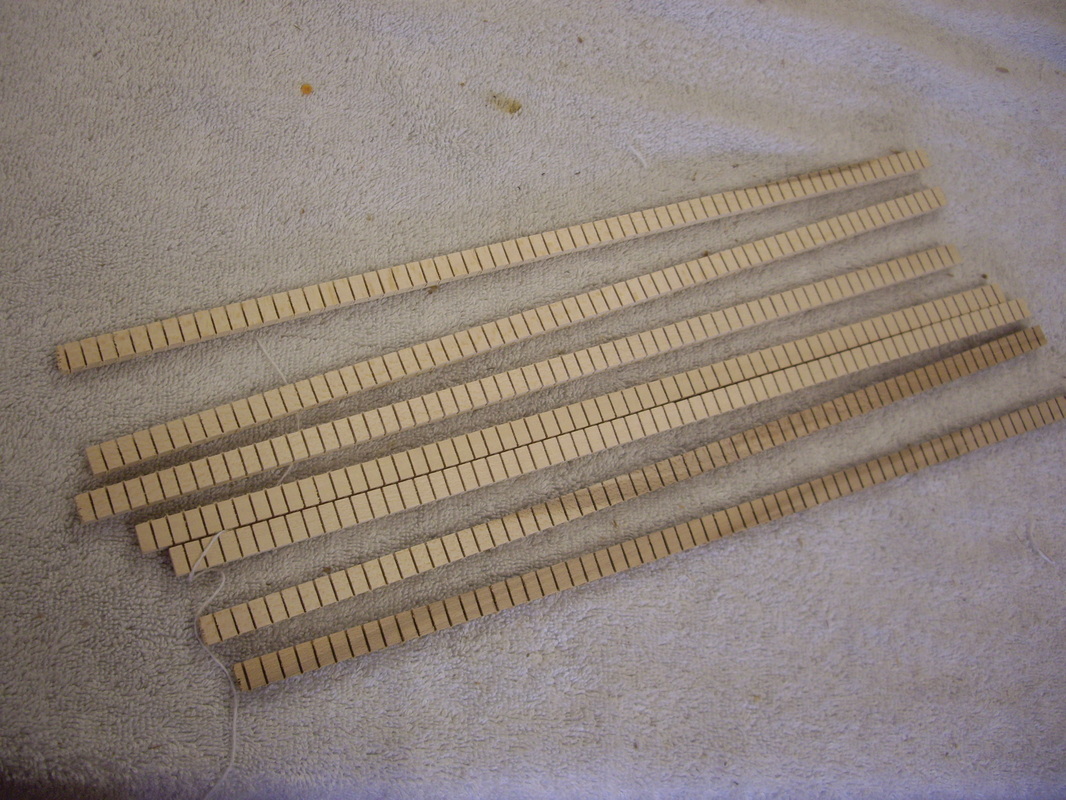
Just for the fun of it I timed myself with my I Phone. It took 3 minutes and six seconds to cut a 16 inch tentalone. I think thats pretty good, but the best part is that they are perfectly regular and look really good on the uke.
I used an exacto knife to cut them into a triangle shape and sanded them smooth with a little 180 grit paper and a rubber eraser sanding block and they were ready to install.
I used an exacto knife to cut them into a triangle shape and sanded them smooth with a little 180 grit paper and a rubber eraser sanding block and they were ready to install.