IN SOME WAYS this is the toughest part of the build. After two days of work it is finally done, and very successfully. Here is todays activity.
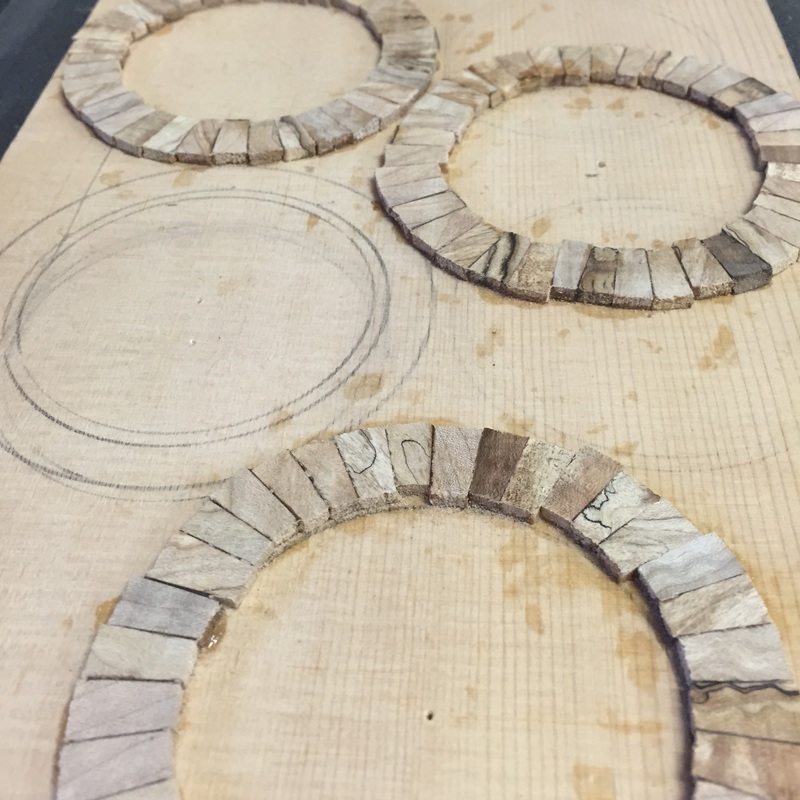
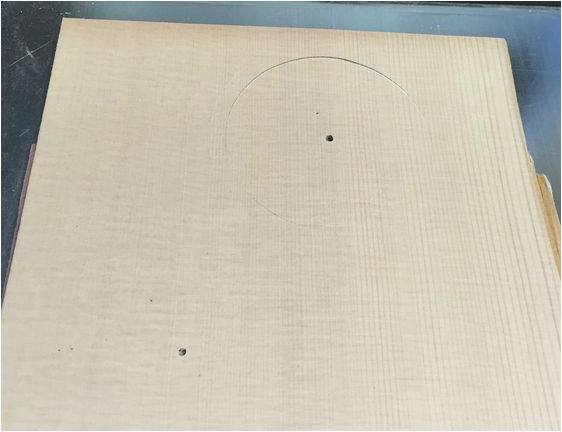
It started with these glued together pieces that are destined to become the rosette. They must be cut into perfect circles of just the right size. First I ran them through the sander to level them out so they would cut well.
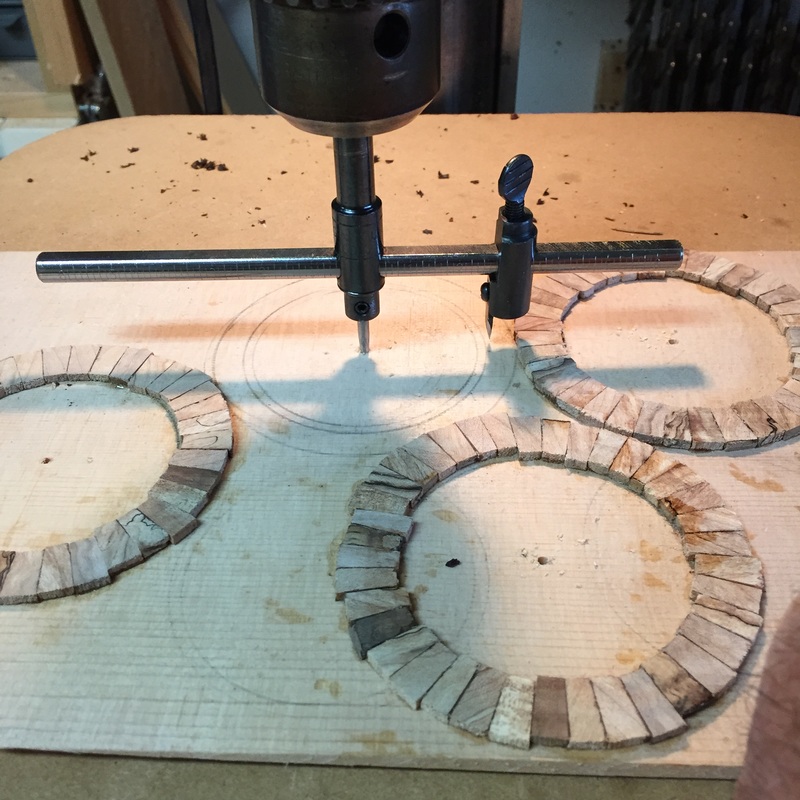
That is done with the circle cutter on the drill press. i honed the blade sharp because this is a critical cut. Also calculated the width of the cut on the drawn circle on the scrap spruce. Also made a test cut on a spare piece of spruce. Cannot be too careful at this point

Now the circle cutter must be set to stop it's cut just above the point where it would cut through and release the ring. You do that with a brake on the drill press preventing you from cutting any deeper than this.
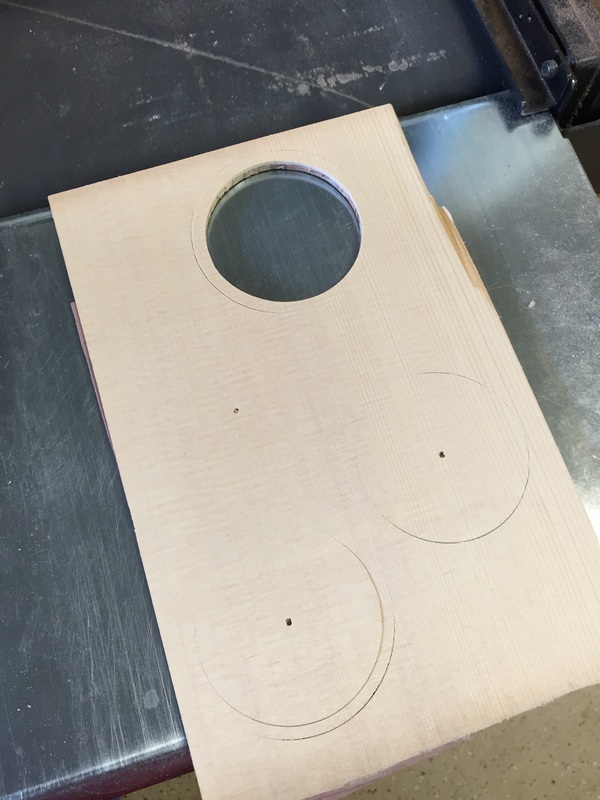
The inside cut has now been successfully made. Now the cutter must be re-set for the outside cut.
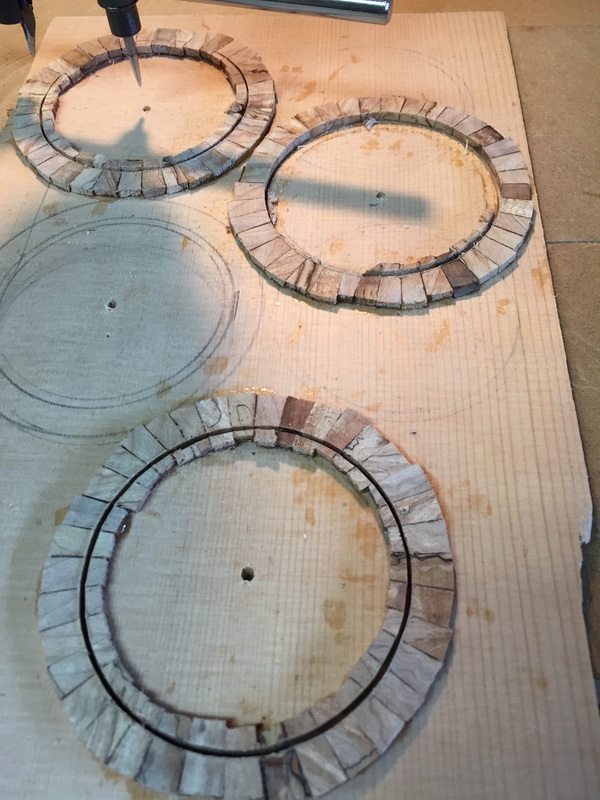
and now the outside cut has been made as well. The cutter went all the way through the rosette pieces and into the scrap spruce to which they were glued. Now, to release the cut off rings and their spruce backing we must turn the whole thing over and sand off the spruce backing. When the sanding gets to the depth of the cut, the rosette will be released.
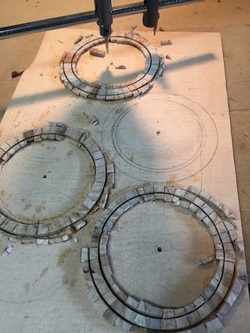
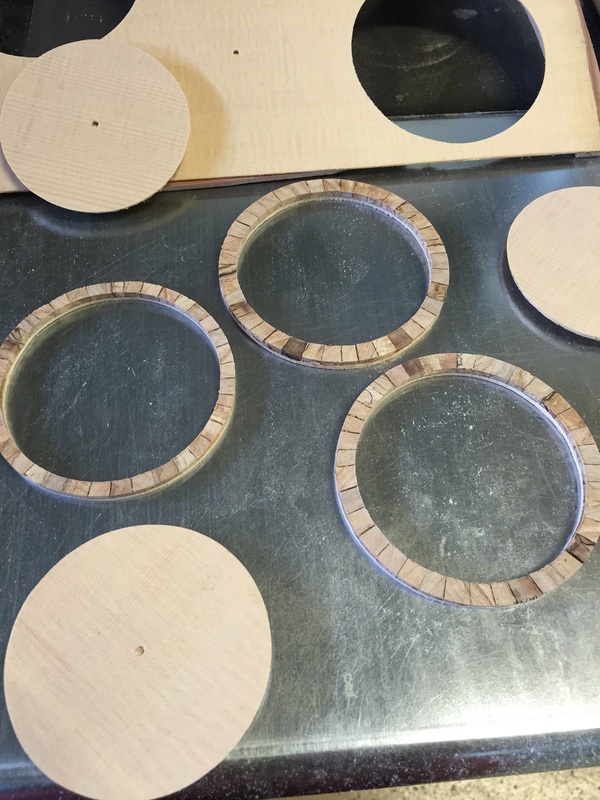
I have been running this piece upside down through the thickness sander sanding off the backing to release the Rosettes. Here you see the first indication that the rosettes will be released from their backing board.
 |  |
And here are the released rosettes. strengthened by their spruce backing.
The next challenge is to cut the groove for the rosette in the top. You must have room for the rosette and two layers of black/white black purfling. The groove cannot be too small or too large.
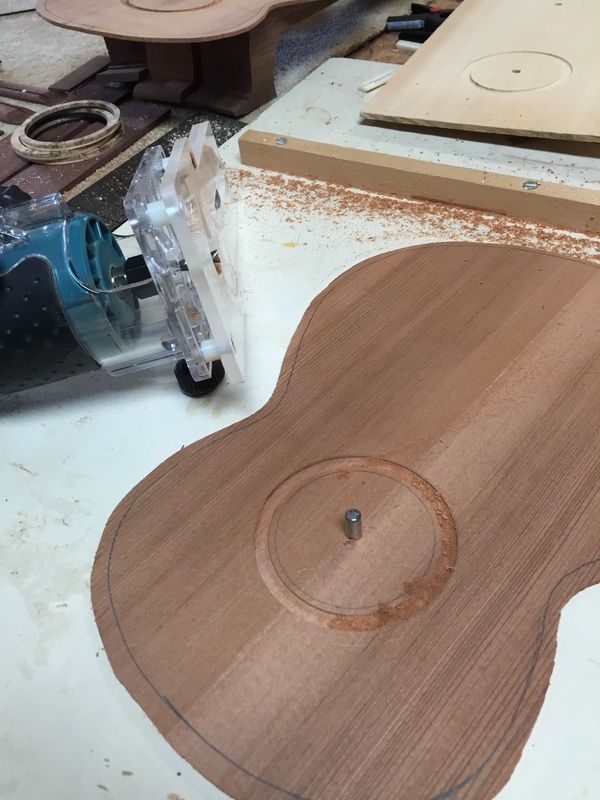
Now we turn to the small router and the circle cutting jig which pivot around this 1/4 inch pin in the underlying plywood board. This is the inside cut.
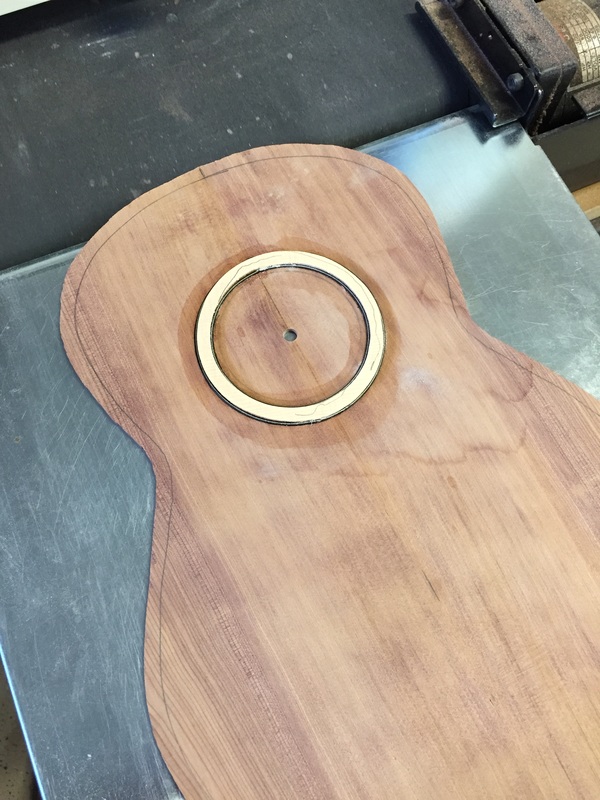
We had to make two cuts, one for the inside, one for the outside, but I think we have it. There is just barely room for the rosette and both the inside and outside strip of purfling. Lets glue in it with superglue and run it through the sander to see how it looks.
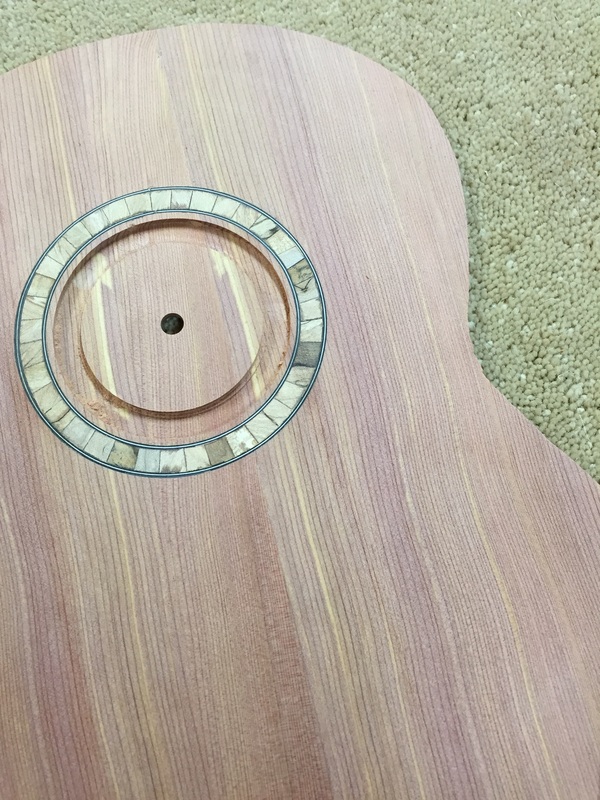
Oh! its looks just right. Now lets set it up again to cut out the sound hole. This is a deep cut but not all the way through. We will sand the top down to installation thickness from the back side and that will free the hole.
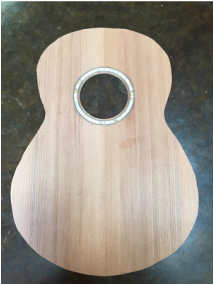 | 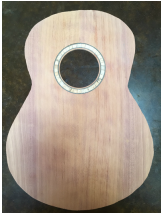 | 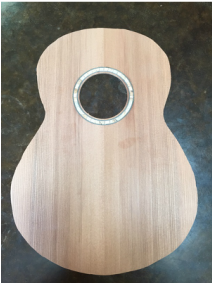 |
And here they are. Three tops for the new tenors. Two days work, but I am very pleased. They are going to look spectacular
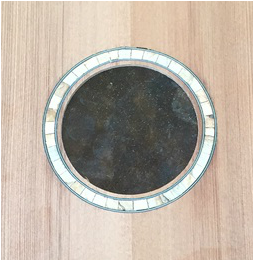
Here is a close up of the redwood rosette. When the spalted maple is finished it takes on a special glow. I am relieved and happy at the results of the last two days. Now to start whittling braces.
