ROSETTES TAKE SOME TIME but the results are worth the effort. I began the process after dinner tonight. It begins with a scrap of spruce sanded smooth.
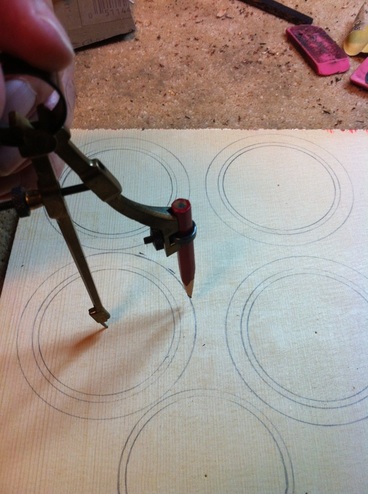
With a compass, set the 1 1/4 inch radius and draw the circle indicating the sound hole. Then expand the compass to the place you want the Rosette to begin. Finally expand the compass once more to the width you want the the Rosette. You now have the outer two lines within which the Rosette wood must be glued to the spruce scrap.
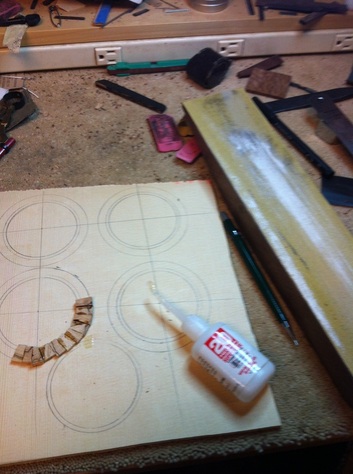
Now I glue tiny pieces of spalted maple cut to an angle so that they will fit tightly together and fit around the drawn circle. each piece receives a little super glue on the face that attaches to the spruce, and a drop on the edge where it meets the last adjoining piece. Carefully select the pieces with figure and character that you will want to have showing in the final product- be sure you place the "show" side down facing the spruce backing.
Notice the sanding board to the right of the photo. I use that to sand off any rough edges on the tiny pieces to assure a tight fit.
Notice the sanding board to the right of the photo. I use that to sand off any rough edges on the tiny pieces to assure a tight fit.
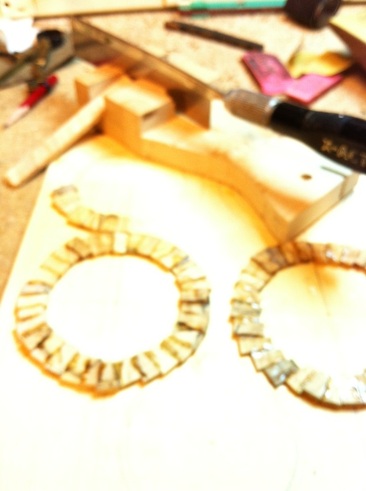
Here you see two of the circles completed. I put a little super glue in the joints above and then hit it with the catalyzer. After I get these four circles completed I will pass them through my thickness sander until they are entirely smooth on the top surface, still glued to the spruce backing.
Notice the little black handled Exacto saw in the upper part of the picture. (sorry about the focus).
That is what I use to cut the pieces. I saw spalted maple in strips, put it in this little home made device that allows me to cut several different angles. Not very high tech, but effective.
Notice the little black handled Exacto saw in the upper part of the picture. (sorry about the focus).
That is what I use to cut the pieces. I saw spalted maple in strips, put it in this little home made device that allows me to cut several different angles. Not very high tech, but effective.
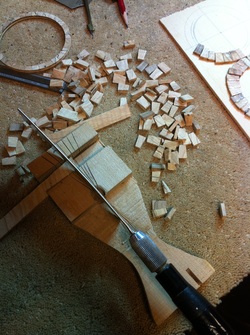
Here is a better picture of the device. See the various angles I can cut.
You have to have a certain tolerance for boring jobs to do this, but a half hour of sawing will make a lot of angled fragments.
You see a finished Rosette in the upper left hand corner. When the glue is all set and the surface of the glued down rosette has been sanded down level you simply take the work to the drill press and with a fly hole cutter (gasket cutter) you cut the circular rosettes to size. THE TRICK IS TO NOT CUT ENTIRELY THROUGH THE SPRUCE BACKING PLATE. CUT ENTIRELY THROUGH THE ROSETTE AND JUST PARTIALLY THROUGH THE SPRUCE.
THEN YOU TURN THE WORK OVER AND RUN IT THROUGH THE THICKNESS SANDER, SANDING DOWN THE SPRUCE BACKING UNTIL THE ROSETTES ARE RELEASED.
Now you have a rosette like the one in the picture. It is level and it has a thin layer of spruce backing on it. It will be very solid and strong. I will show you what happens next when I get to installing them in the Uke tops.
Can you guess how that is done? Stay tuned, it may be a couple of days before I get there.
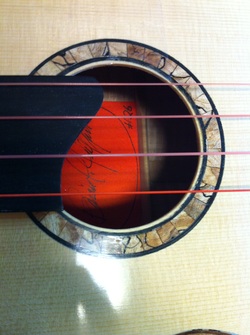
The end goal of all this fussy work is shown here, A spalted maple rosette that I think is very pretty, interesting, and matches beautifully either the cedar or spruce that I typically use for tonewood. I purfle it with just plain black. I think anything fancier would be gilding the lily.
