WHEW ! what a day. Worked on making and installing rosettes most of the day and finally got them glued in after dinner. Heres the process.
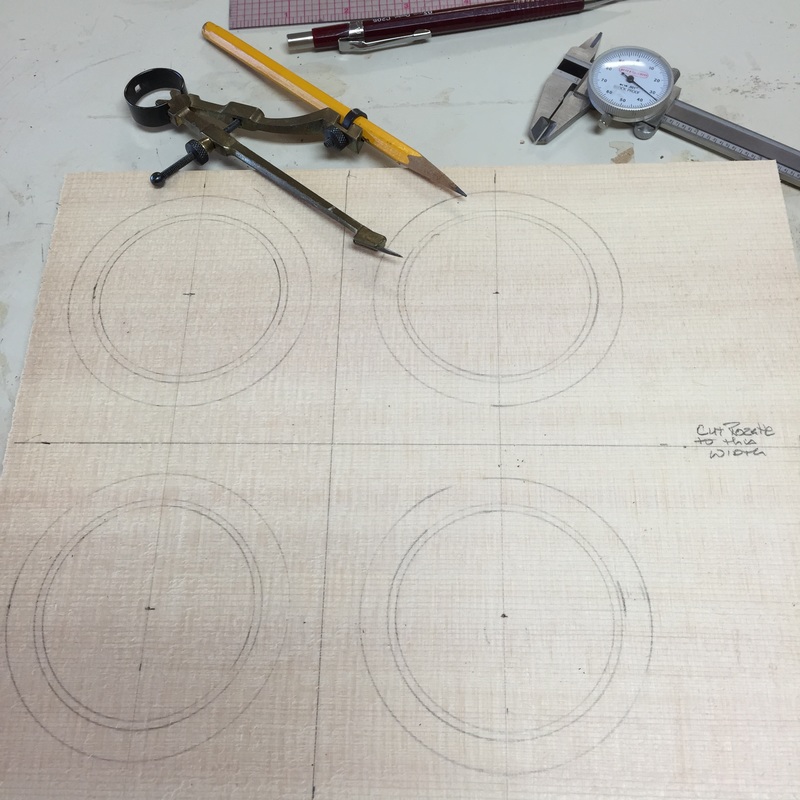
First I plan out the size of rosette I want and draw it on a scrap of spruce. This is the size of the entire channel, The rosette and two courses of purfling will have to fit into this space
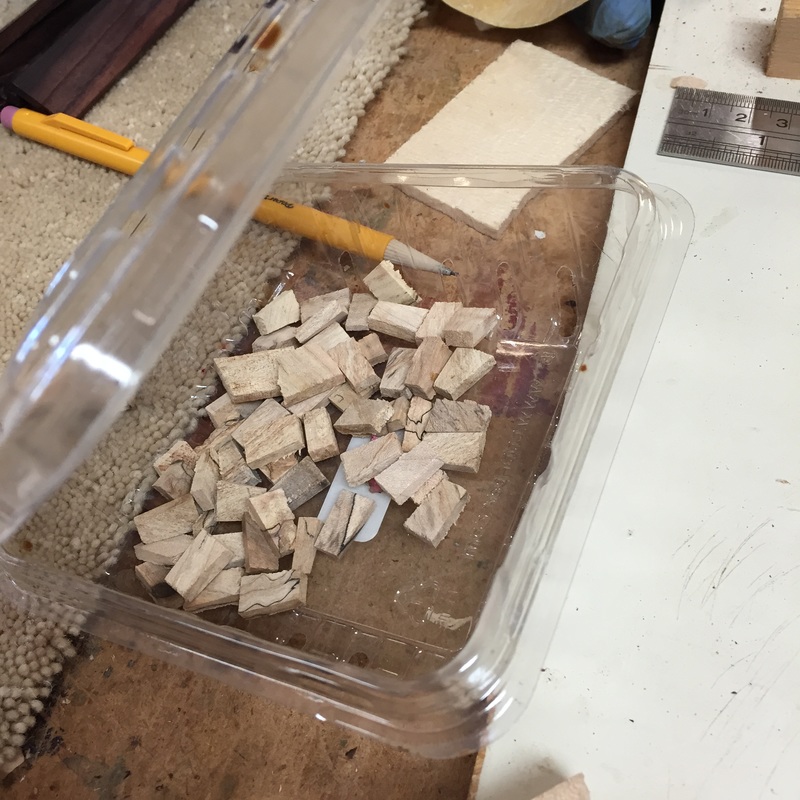 I make most of my rosettes with little pieces of spalted maple that I glue onto the scrap of spruce | 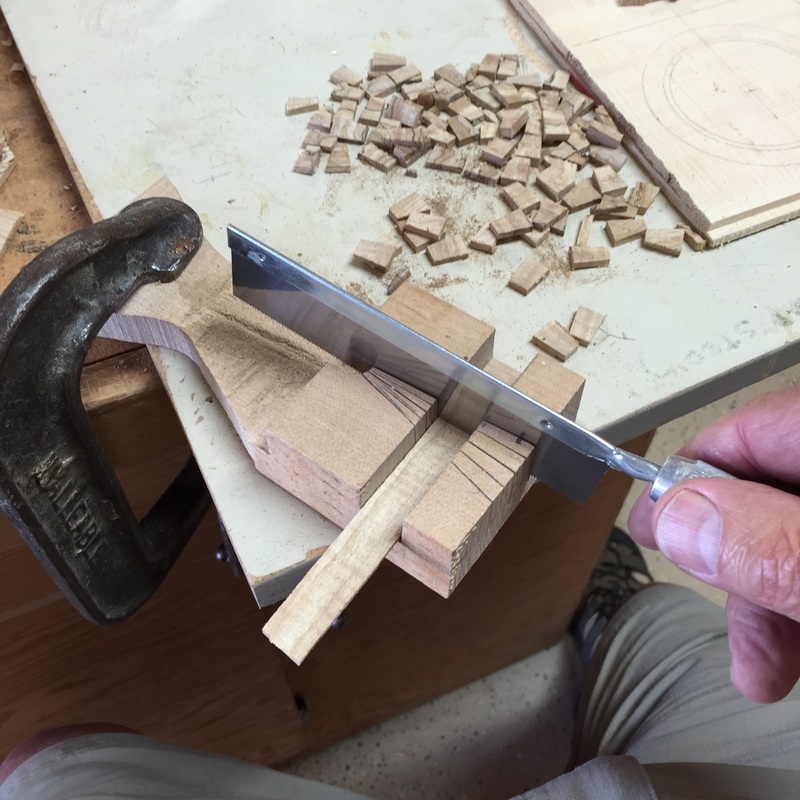 I cut each one with this little gizmo and a fine tooth exacto saw. |
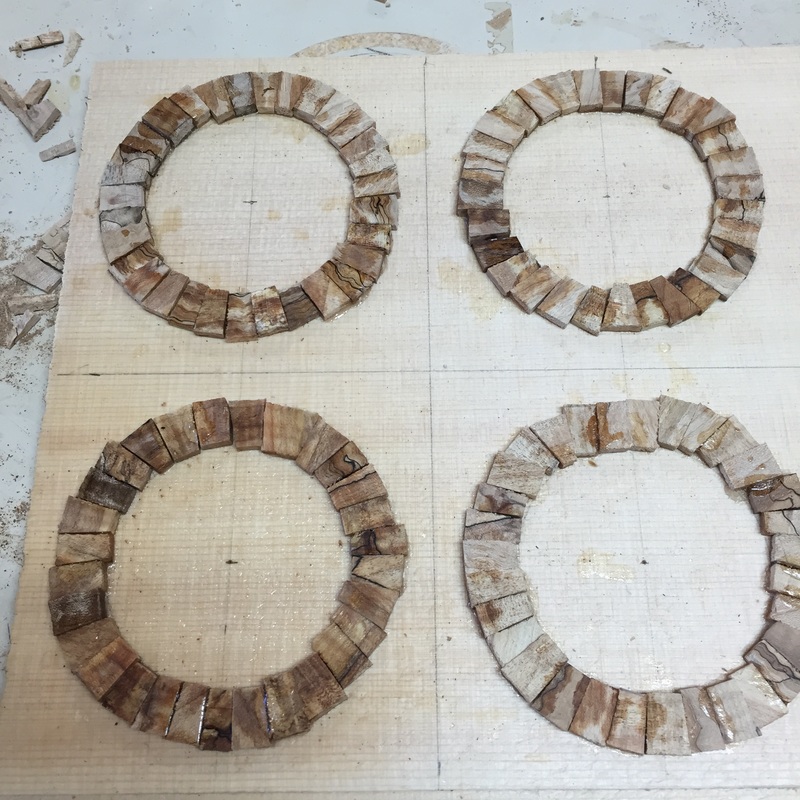 Using super-glue I glue each one to the spruce scrap covering the drawn circle. | 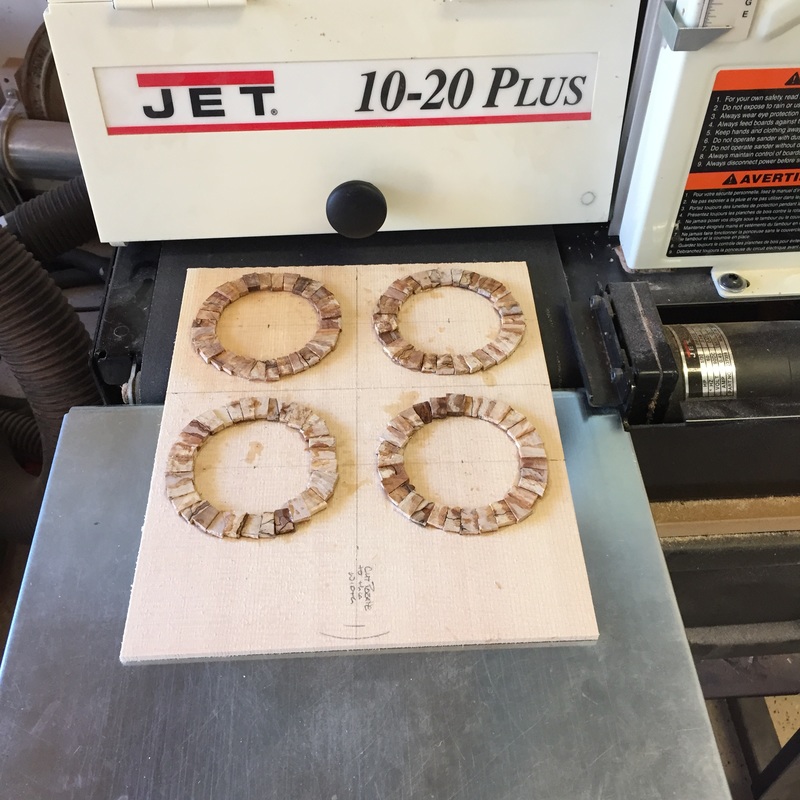 Now the circles go into the sander to be leveled down to the same height and thinned down a bit. I will be cutting circles in them and don't want them thicker than necessary or different thicknesses |
 I drill the plot hole for the hole cutter because I don't want its center point to split the backing nor stray from center. | 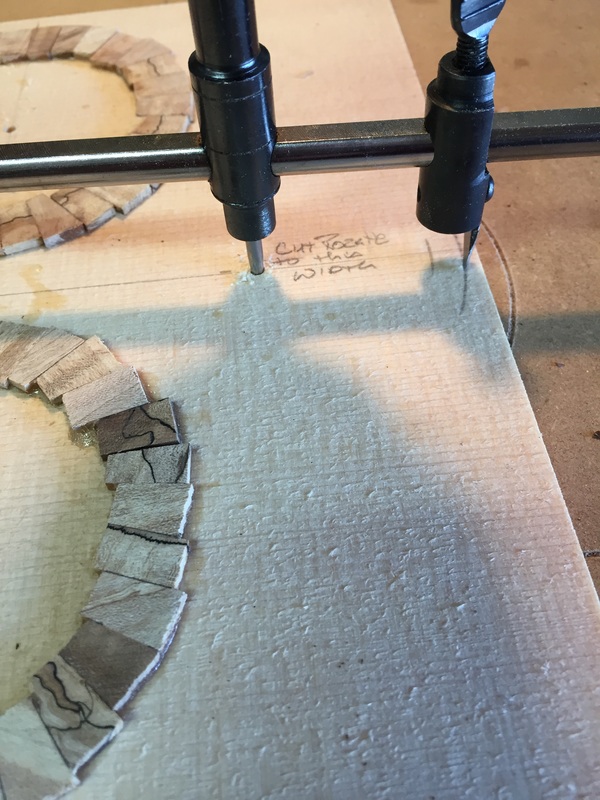 Then carefully setting the hole cutter blade I am ready to cut the rosettes out. |
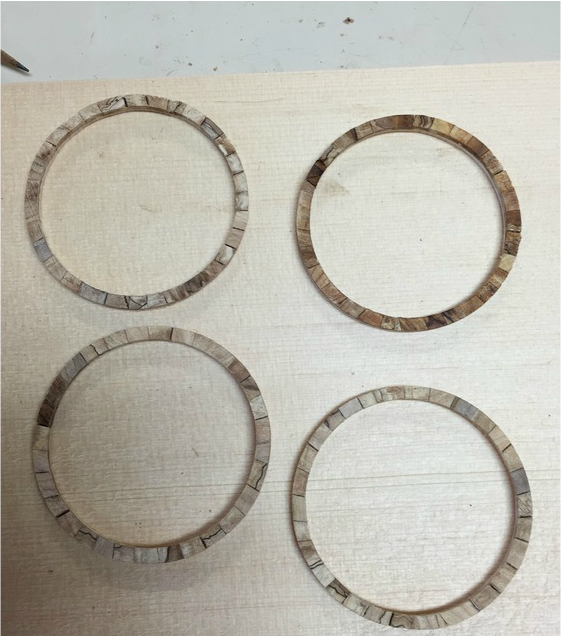
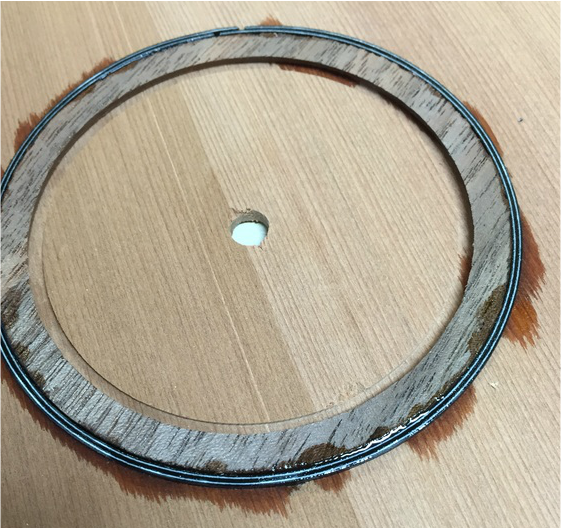
Here they are, cut to size. This surface will be glued face down into the groove I will cut into the tone=wood top.
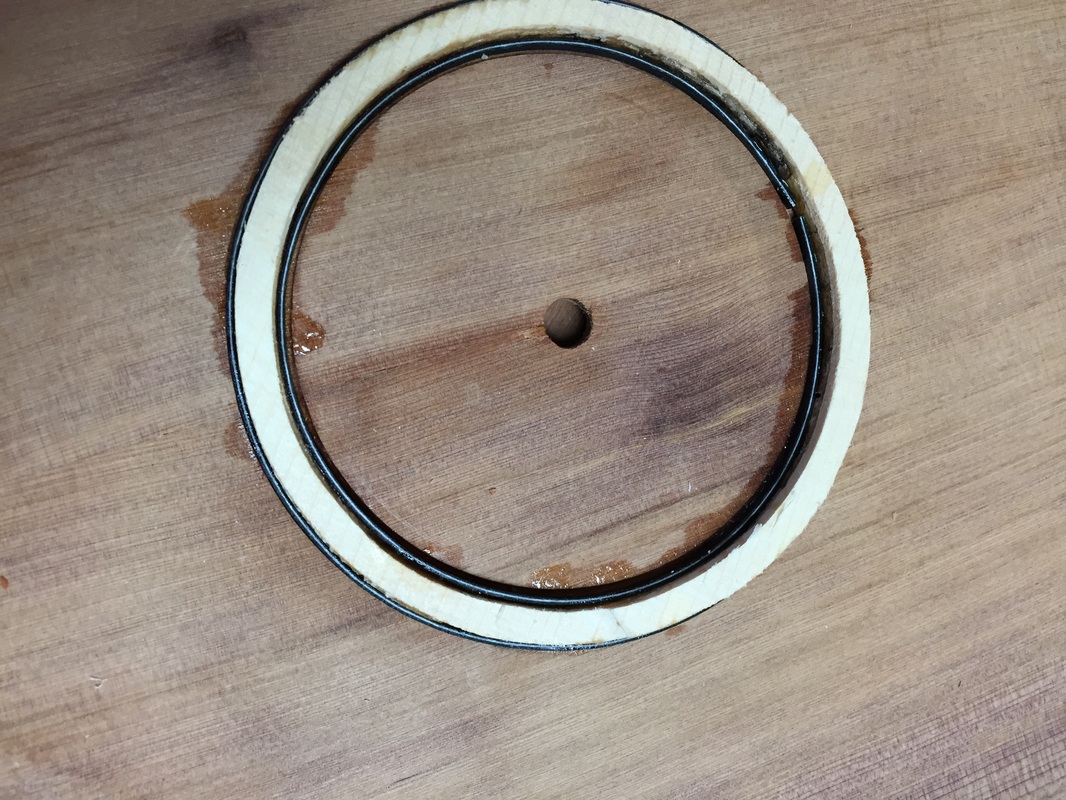
And here is the first one installed into one of the Juniper tops. note the purling on inside and out. The joints are plaeed at the top of the uke and will be hidden by the fretboard. The spruce backing is a bit narrower than the maple ring and will be sanded down to level when the glue is well dried hopefully providing a tight fit.
I decided to use a walnut ring and a double row of "black/white/black on this uke with the East Indian rosewood sides and back. this redwood will get quite dark when finished and a little oxidization from sunlight. It will be a dark instrument and perhaps the walnut will fit better. Got the other bank of purfling in after dinner and it will look good when sanded down.
