Took a couple of days off last week and went to San Juan Island, Took a picture for you of the largest Big Leaf Maple that I have ever seen.
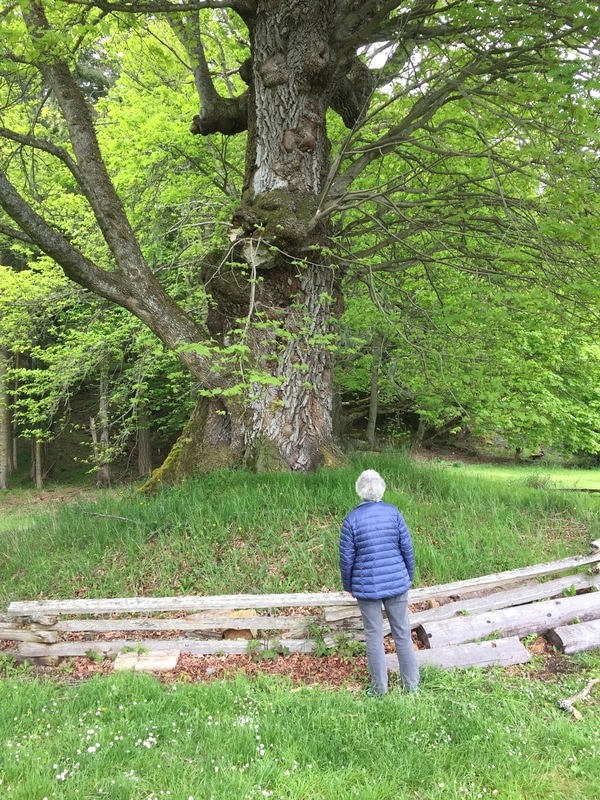
Just imagine how many ukuleles could be made from that baby. It stands in English Camp in San Juan Island National Park
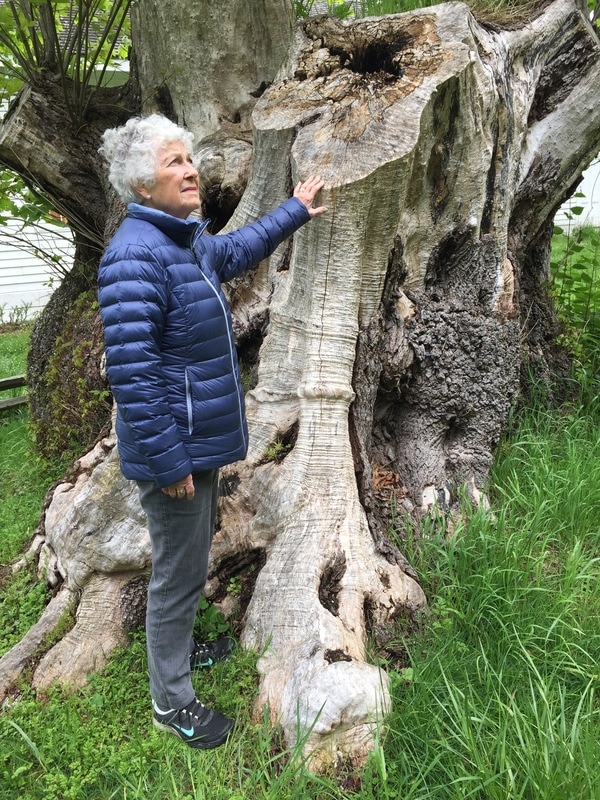
Nearby was this massive stump of another Maple. Look at the burls and the figure on this one. The old tree had obviously rotted and probably fell apart before it was cut like this, but incredibly it was still alive, see the new shoots coming from it. English Camp was established in 1859. I wonder how old the tree was, (or is)

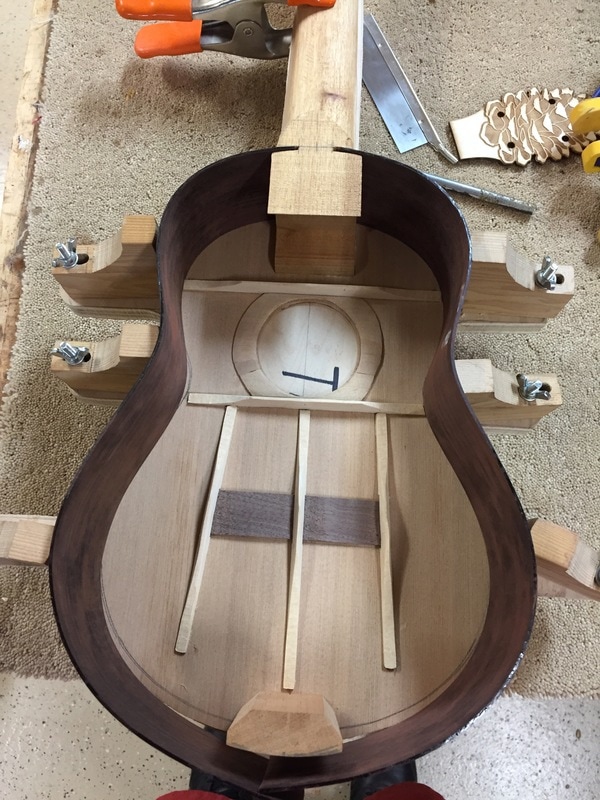
Back in the workshop I decided to attach the sides to the Tenor I am working on. Before doing that, this is the last best chance for a final trim of the braces and tone bars. I usually find that once the are glued to the top they seem a little thicker than they need to be, so with a sharp chisel I do a final trim. Remember- think vibration.
Now to fit the sides before glueing. The sides are always made a little long. You then saw off ends as you fit them. Here, the upper end of the sides have been trimmed and the fit looks great. Now to measure and trim the lower ends of the sides so that they meet at that little pencil mark you can see on the butt plate.
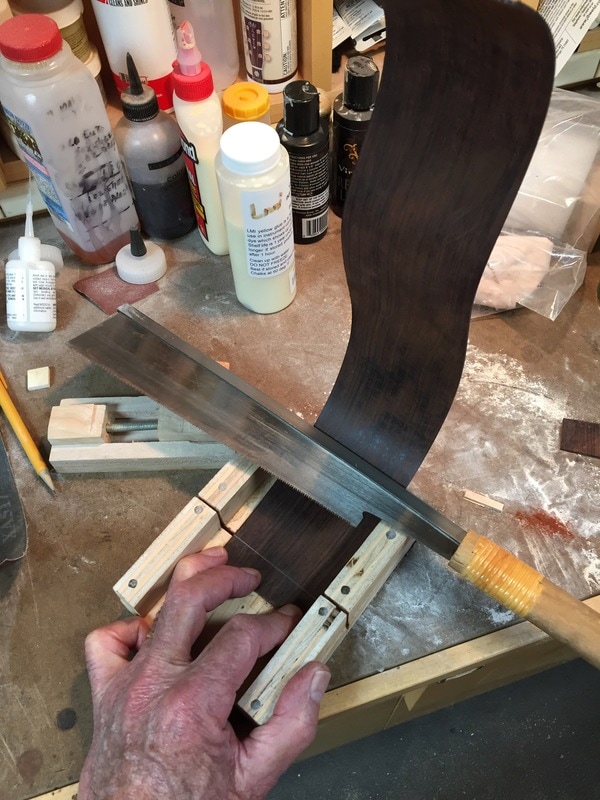

Here is how I trim the ends.

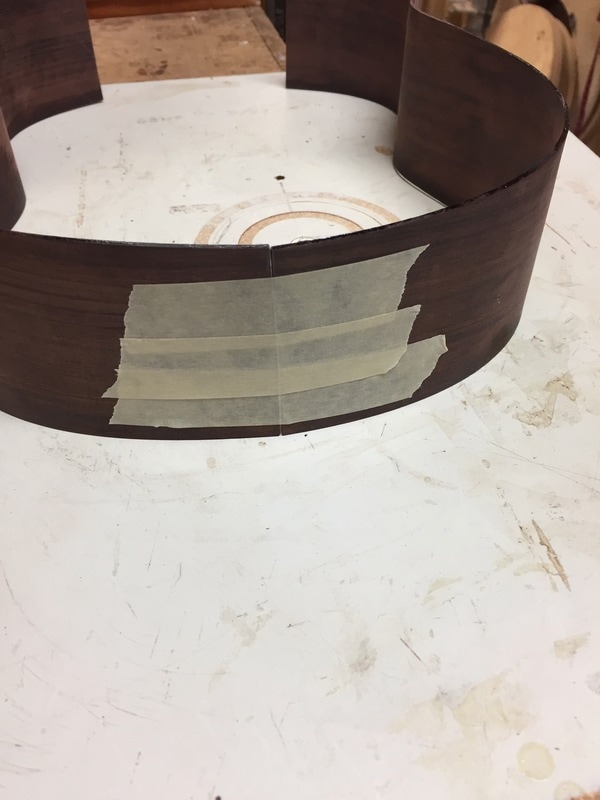
Once the sides are trimmed to fit just right, the ends are taped together to aide in the assembly. The bottoms of the sides receive glue and the butt plate is glued, and then into the assembly jig to be clamped down.
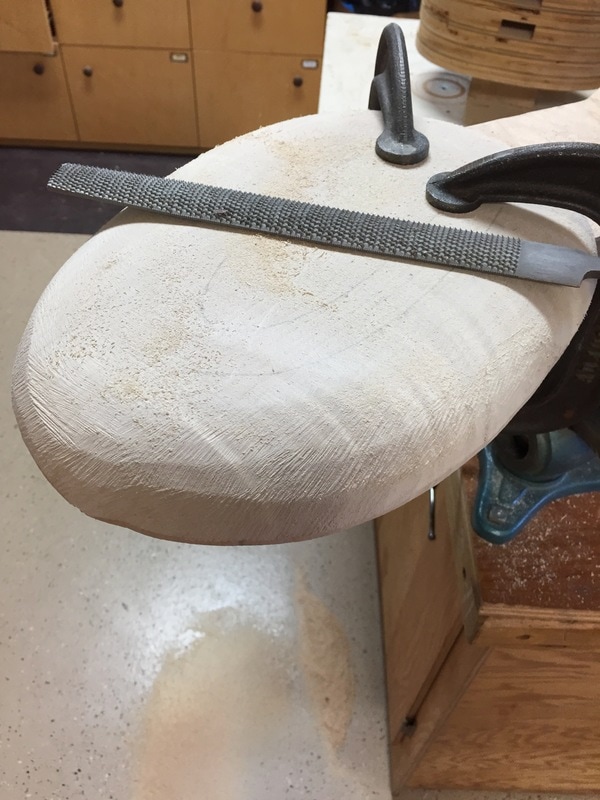
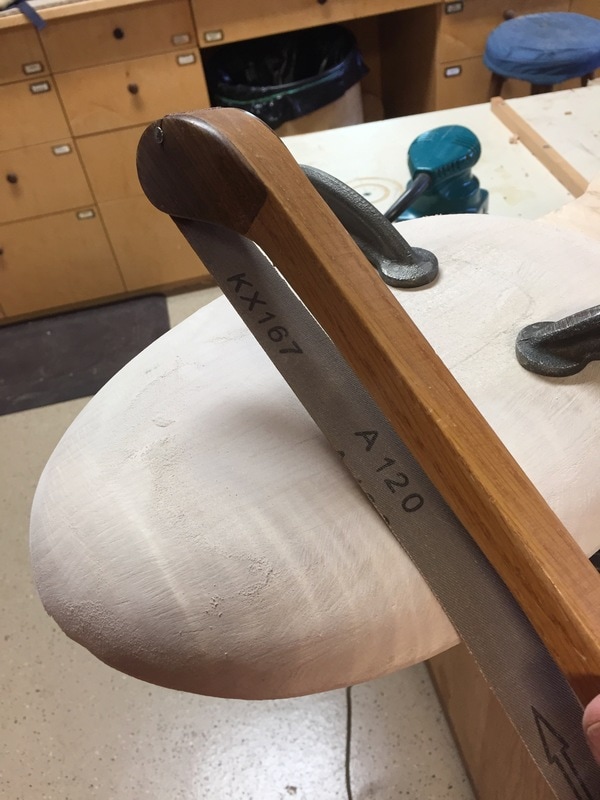
Next I turned my attention to the Tenor Pinecone back. This is a pig piece of tiger stripe maple bit over 1 inch thick. I marked the underside with the oval form of the instrument tracing around the sides that are now attached to the soundboard. The back is clamped to a carving stand held in the bench vice. I will first shape the curved back with very sharp wood rasps. First a very rough one, then a smoother rasp
Once I have achieved the shape that I want, those rasp marks must be removed. I find that the bow sander fitted with 120 grit sandpaper works best. It smooths and also improves the shape.
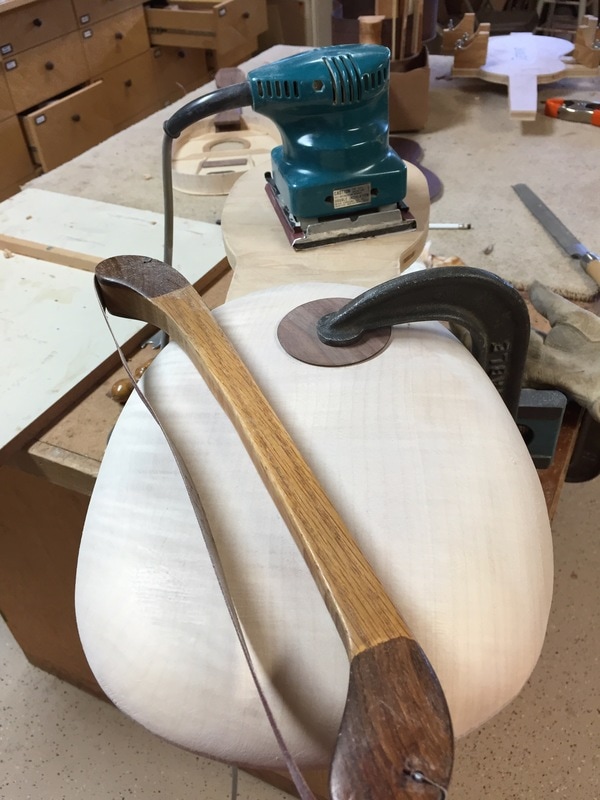
Now it is about where I want it. I may finish up with that electric thing in the background.
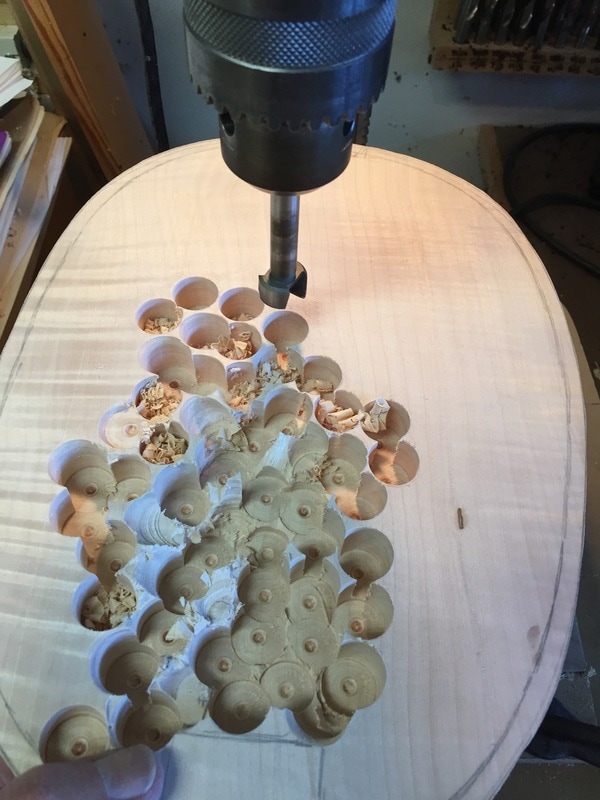
Now to the drill press and the Forstner bitt to hog out the inside . More of that story later.
