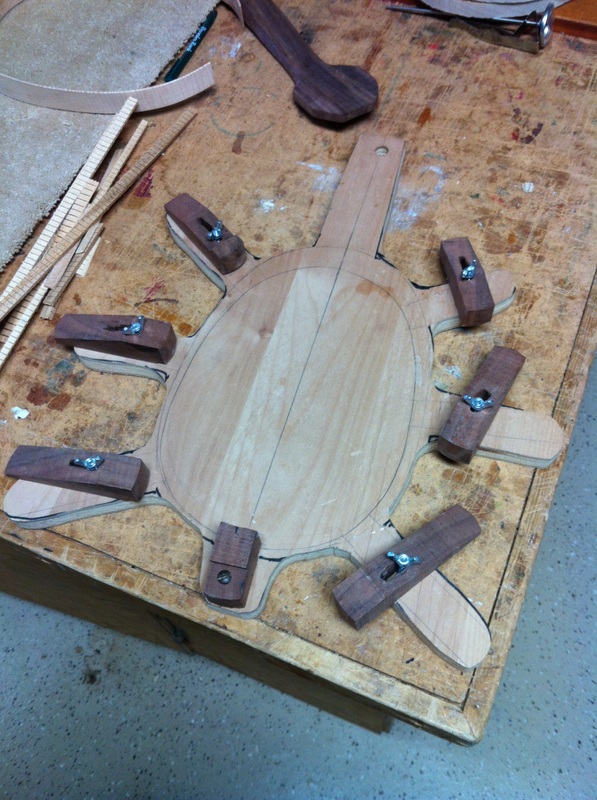
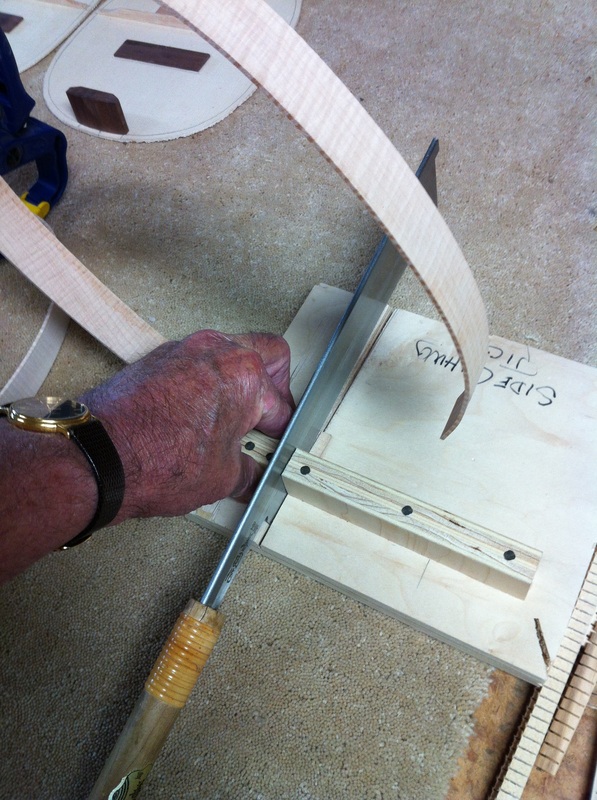
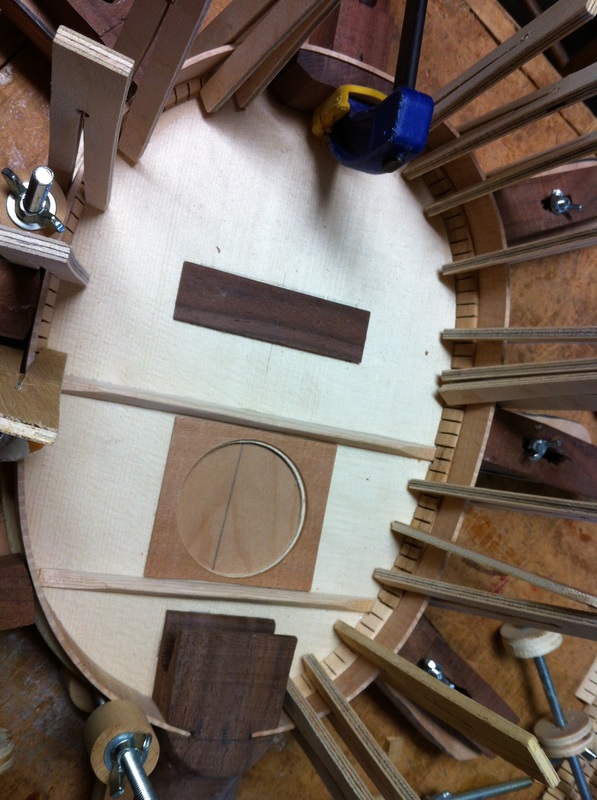
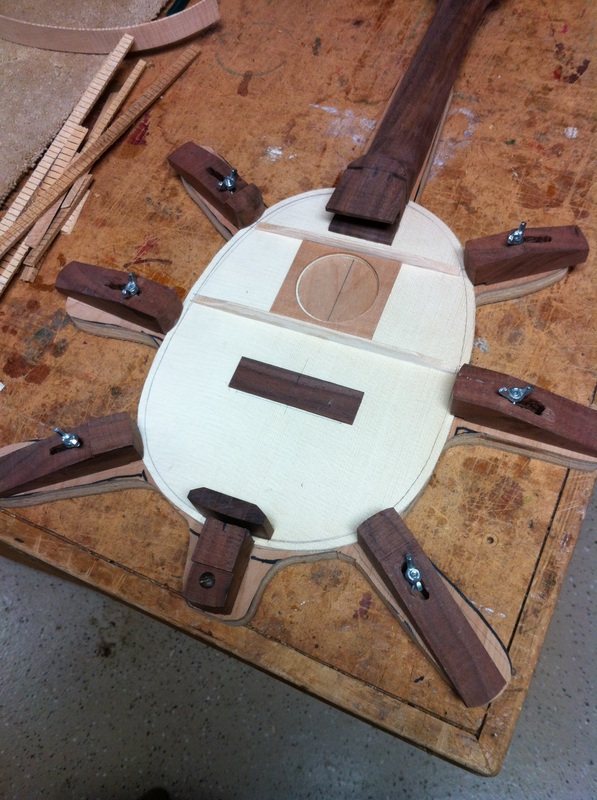
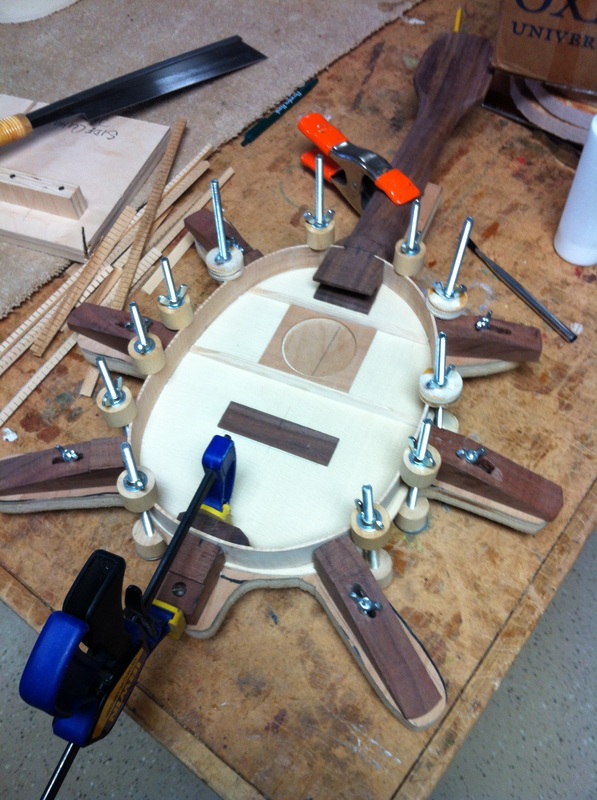
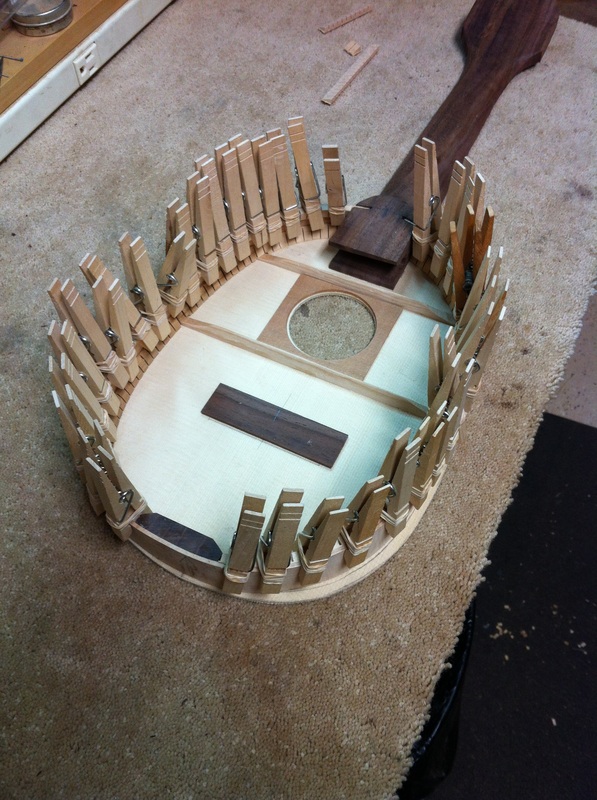
| 1. HERE IS THE "TURTLE" Like so many functions in lutherie, you need to have a jig. I made the "turtle" to aid in assembling pinecone ukes, both concert and soprano. It works really well allowing me to adjust and place the sides exactly where I want them. 3. YOU MUST TRIM THE ENDS to the proper length so that the sides fit perfectly on the scribed lines on the underside of the top. Takes some trial and error and probably more than one trim cut to get it right. Better to take lots of "too little" cuts than one "oops, thats too much" cut. I use a simple miter board to get a square cut- and a fine tooth Japanese "pull saw" a great tool. 5. GIVE THE GLUED edge an hour to set up and then for true strength you glue on the tentelones, the little strips of wood cut so you can bend them around the shape of the side. They are what really hold an instrument together. They are glued on two sides and held in place with clamps made from pieces of 3/16th plywood cut down the middle to provide a scissors hold. | 22. HERE IS THE TOP AND NECK in position on the "turtle" I clamp the neck to the neck of the "turtle" with a cushioned clamp. The brown wood braces are movable in and out to address the side when it is installed. A cutaway under the brace allows the edge of the top to slip under the brace. 4. WITH THE SIDE glued on the under edge I now clamp it down tight with these barrel clamps and I have also glued the bottom of the side to the butt plate and secured it with an Irwin clamp. Note that the walnut braces are now held in position by their wing nuts and keeping the side in exactly the right position while the glue dries. 6. ONCE THE TOP TENELONES are dry it is time to take off all the clamps and with clothespin clamps, glue the bottom tenelones on. Once the back is carved it will be glued to these tentelones. |
| Griffin Ukuleles |
|
