Building ukuleles is all about using various jigs to aid in the construction of an instrument. Today I spent most of the morning making an improved end inlay jig, borrowing heavily from an idea developed by my Pennsylvania friend Jon Dale
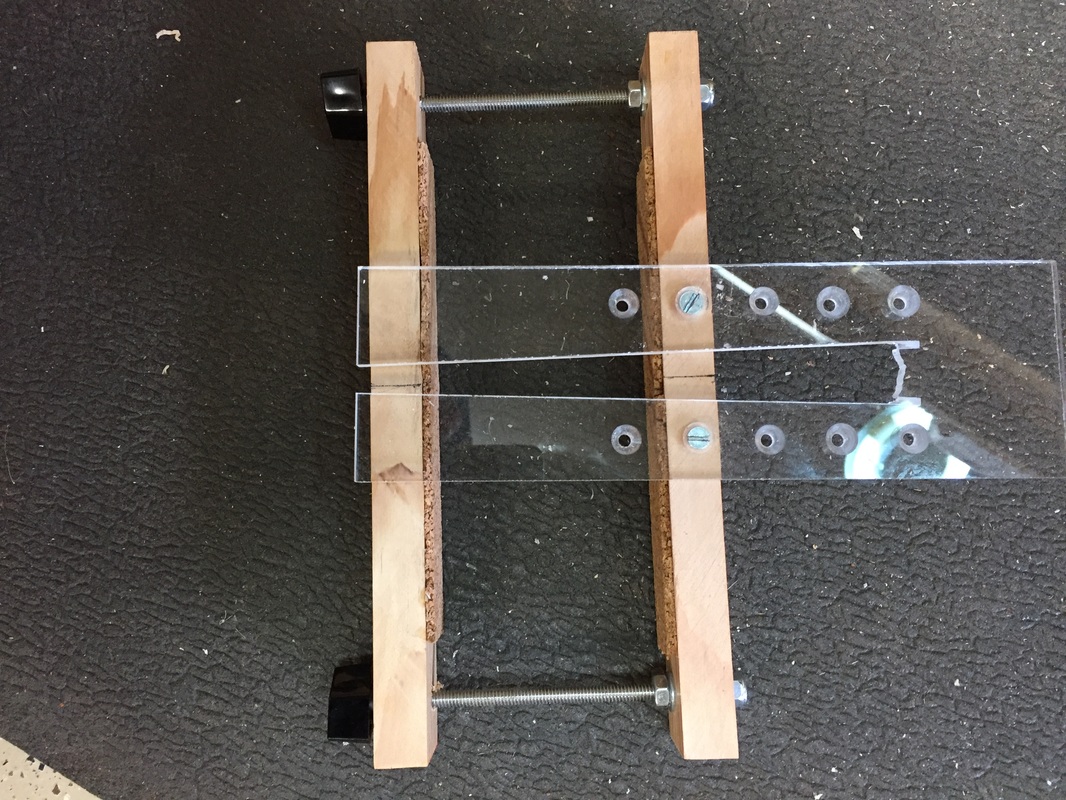
This is a router jig which clamps over the end of the uke tightened down by the black knobs on the left. That holds the acrylic router guide centered over the end of the instrument. The acrylic guide forces the router to cut just the tapered shape shown and the width of the tapered channel can be made larger by using the three alternate screw holes on the right. This clamp device allows for changable acrylic plates which could be made another configurations. Straight cut, curved cuts in any form. I think I will stick with the taper for now but will be experimenting with other options later.
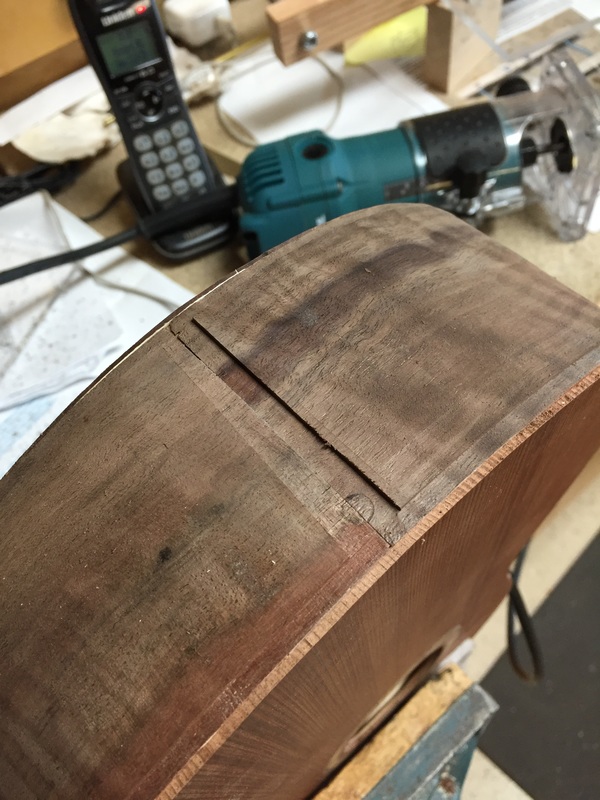
Here is the final result. A nice tapered channel into which I will inlay a piece of wood that matches the binding and purfling. It's purpose is purely cosmetic, to hide the joint where the two sides meet. That joint is un-interesting at best and ugly at it's worst, so I always hide it with an end inlay.
Now it is time to apply the binding, and then these tenors will begin to look like something. Maybe tomorrow if I have the time.
Now it is time to apply the binding, and then these tenors will begin to look like something. Maybe tomorrow if I have the time.


