INSTALLING the rosette is a delicate and somewhat complex process. I will attempt to show you how I do it in this rather long series of photos and explanations.
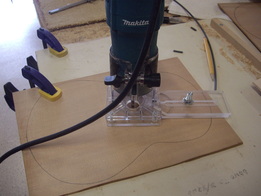
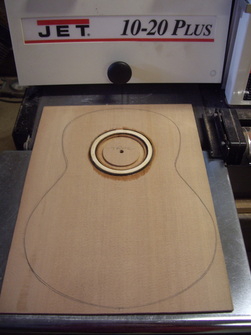
First I adjust the laminate cutter circle guide to cut the sound hole. The bit is set to cut almost entirely through the wooden top but not quite. We will sand off the bottom of this piece later to free the hole.
The Circle Guide rotates the router around a 1/4" pin inserted into the work surface below.
I test all of these cuts on a piece of scrap seen on the right. You want to be slow and deliberate so as not to waste a piece of this beautiful tonewood.
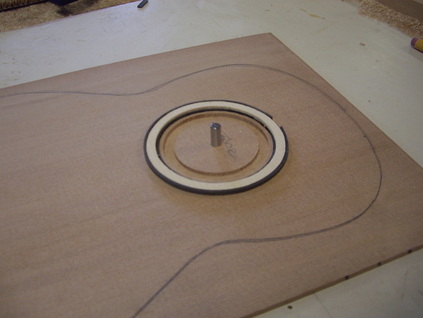
Next cut is much shallower. If your working thickness is to be .90 you want the rosette cut to be .70. I reset the router to make the cut wider and shallower allowing for the width of the top to show between hole and rosette. You must also calculate and set the router for a cut the width of the rosette and the contrast piece that will wrap around it.
Next cut is much shallower. If your working thickness is to be .90 you want the rosette cut to be .70. I reset the router to make the cut wider and shallower allowing for the width of the top to show between hole and rosette. You must also calculate and set the router for a cut the width of the rosette and the contrast piece that will wrap around it.

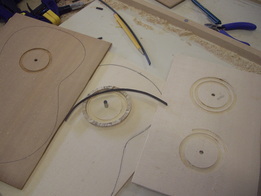
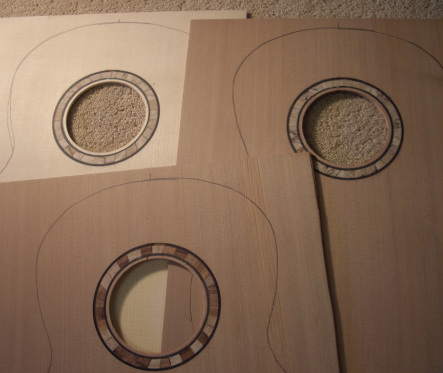
Note the differing depths of the cut. The smaller cut is almost entirely through the wood and will become the sound hole. The
wider cut will receive the Rosette and a dark strip of purfling on both sides of it.
wider cut will receive the Rosette and a dark strip of purfling on both sides of it.
Here is the Rosette placed upside down in the groove and trimmed with dark brown purfling strips. Note that the purfling does not meet at the top. No problem as that will be covered by the fret board. The light color of the Rosette is the spruce scrap that the true Rosette is glued to. It will soon be sanded away to show the true Rosette.
When everything is in place I squirt super glue around the circle. It quickly enters all the spaces between the parts. I let it seep in for ten minutes and then spray it with fixative. It sets up almost immediately and we are ready for the next step.
When everything is in place I squirt super glue around the circle. It quickly enters all the spaces between the parts. I let it seep in for ten minutes and then spray it with fixative. It sets up almost immediately and we are ready for the next step.
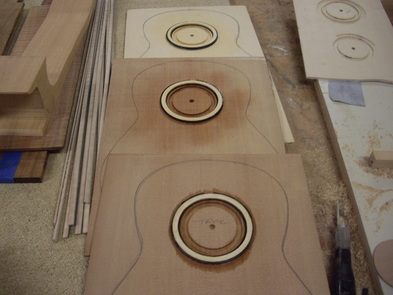
Here are all of the tops with their rosettes and purfling installed and glued. Note the glue stains around the circle. That will sand away in the next step, the Thickness Sander.
The tops will pass through the sander many times gradually sanding the protruding Rosette down to the level of the rest of the top. Then a pass or two to clean up the glue stains and the top surface will be done except for fine hand sanding later. Now the top is turned over to sand enough off the back to free the sound hole plug.

Just a couple of passes through the sander and the sound hole plug is released.
AND THE ROSETTES ARE COMPLETED PHEW !!!
