I HAVE BEEN INSTALLING MI-SI PICKUPS IN CLIENTS UKES LATELY I thought you might enjoy seeing the process. Your first time it is pretty scary drilling a huge half inch hole in the end of that lovely ukulele but once you get it figured out it is really quite easy. Here in a series of pictures is the technique. I will run this for several days because don't want to leave anything out, so tune in tomorrow and the next day and maybe the fourth day for the exciting finale.
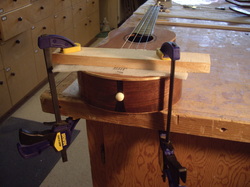
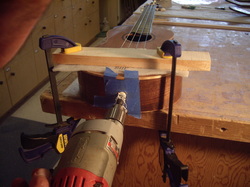
Before you drill you want to have the uke firmly held in place. Heres how I do it, with padding top and bottom two clamps hold it down to the work bench. This uke has a big white strap button that must come off
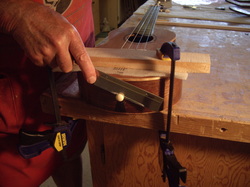
I saw it off with the fine bladed saw made by Exacto. Be sure you don't cut it off too close to the instrument or you might scar the finish. I forgot one step here, know what it was?

Always make a small guide hole in the very center where you want to drill. I do this with a small drill bit in a hand held finger drill. Just a starter hole is all you need.
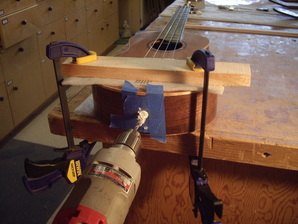
Aha, now you can see what I forgot, the blue masking tape to protect the wood from a slip. Got lucky this time, no slips. I am drilling with a small bit for starters.
As always, the right tool is critical. This is a "Step Drill" really made for drilling sheet metal, but it works perfectly for our need. It drills a controlled clean hole in wood and you start the small 3/8ths end in the starter hole you have just drilled and it walks you right up to 1/2 inch.
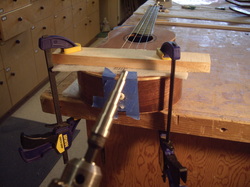
And here it goes, smoothly, in controll, it is even taking care of the remains of the white strap button. You want to chuck the drill as far out as you can because you must drill that 1/2 inch hole through the butt block at the end of the instrument. Their thicknesses vary but I make mine almost 3/4 inch thick, so there is a lot to drill through.

Here is the result, a perfect, clean 1/2 inch hole ready to accept the
Mi-Si . But you have one more hole to drill.
Tune in tomorrow for another hair raising installation tale!!
Mi-Si . But you have one more hole to drill.
Tune in tomorrow for another hair raising installation tale!!
