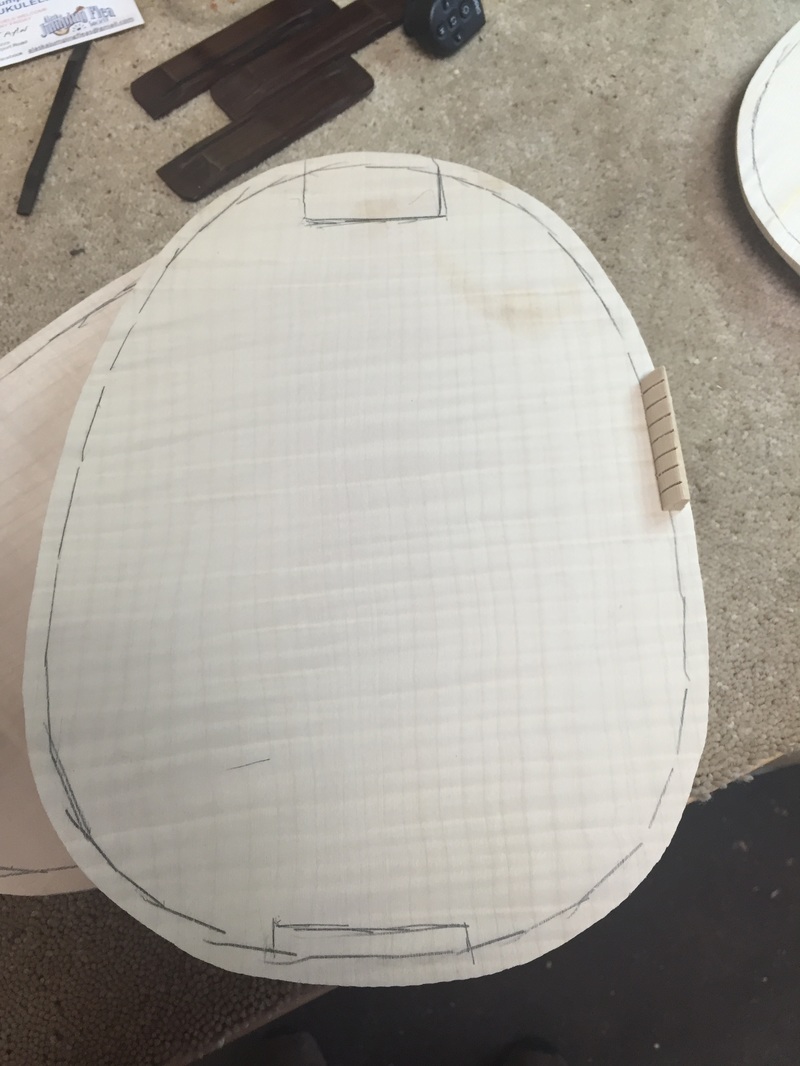
Now we turn that back over and hollow out the underside. But first we must mark the perimeter which must not be touched. This is what will be glued to the tentelones glued to the sides. It is what will hold it all together. So a line of the proper width is drawn around the entire piece.
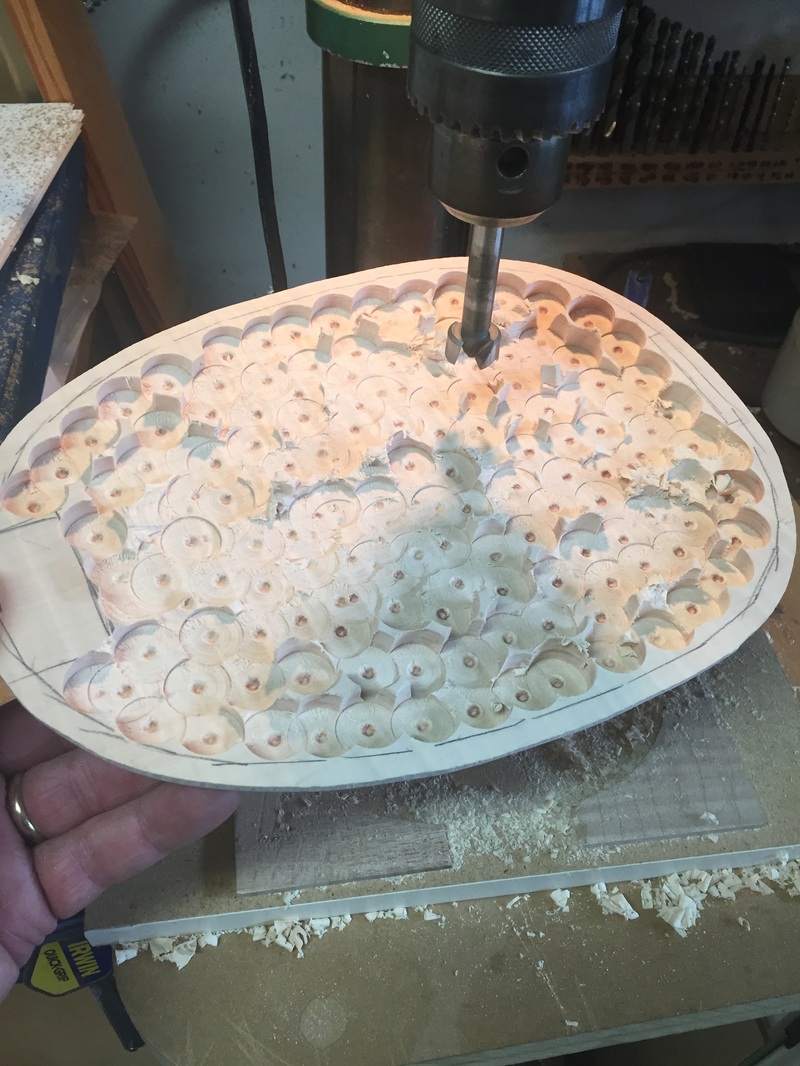
Next we set up the drill press with this drilling post padded with cork. The Forstner bitt has been modified a bit with the center pin ground down so it protrudes no further than the cutting edges.
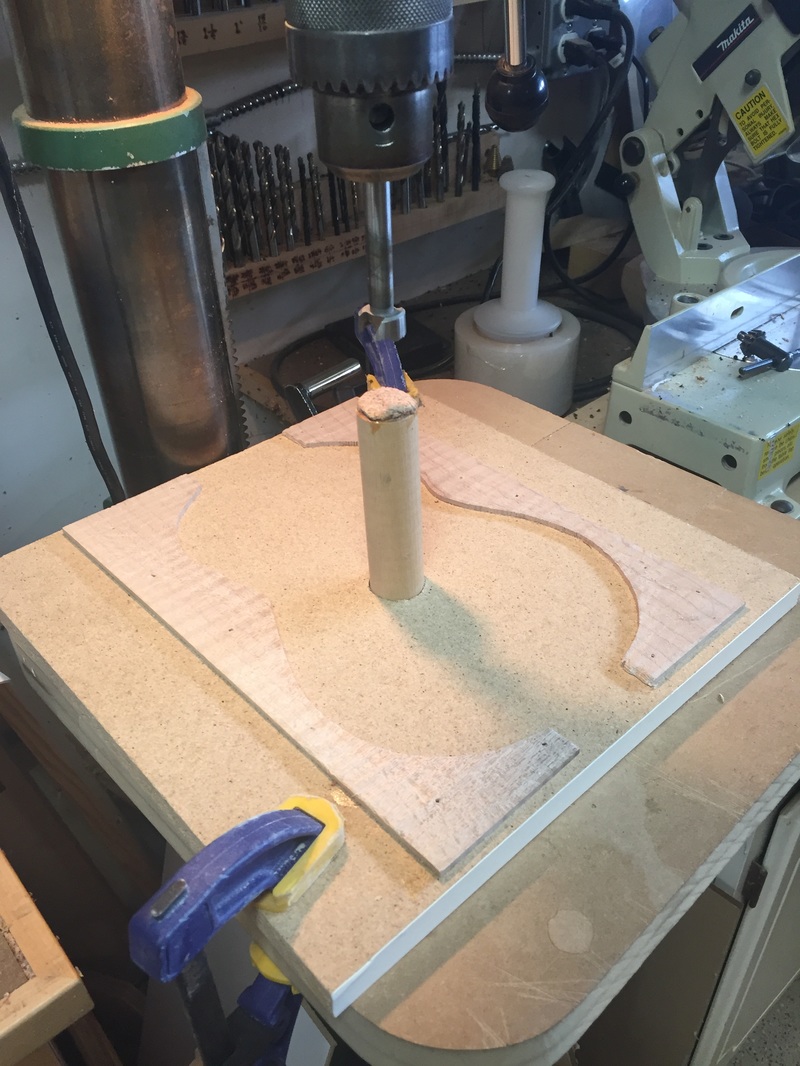
Now set the drill press to stop just an eighth of an inch above that padded post.
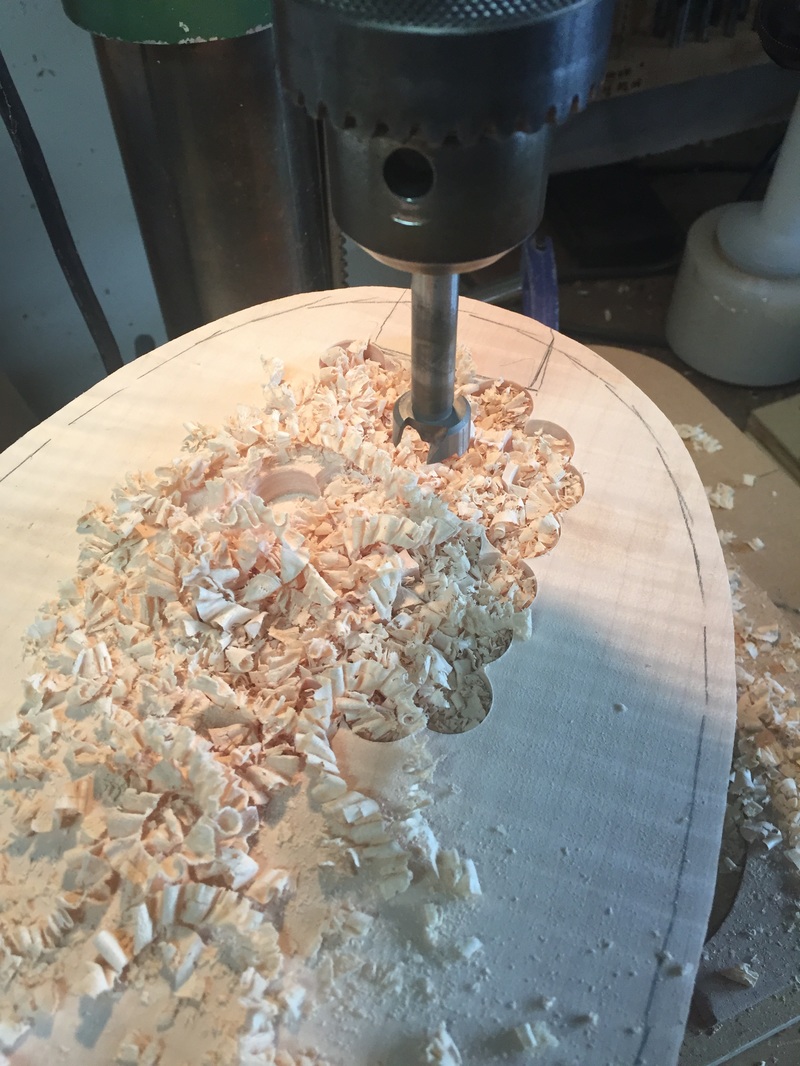
With each stroke of the drill press you are hogging out a lot of wood.

Until finally it is all hogged out
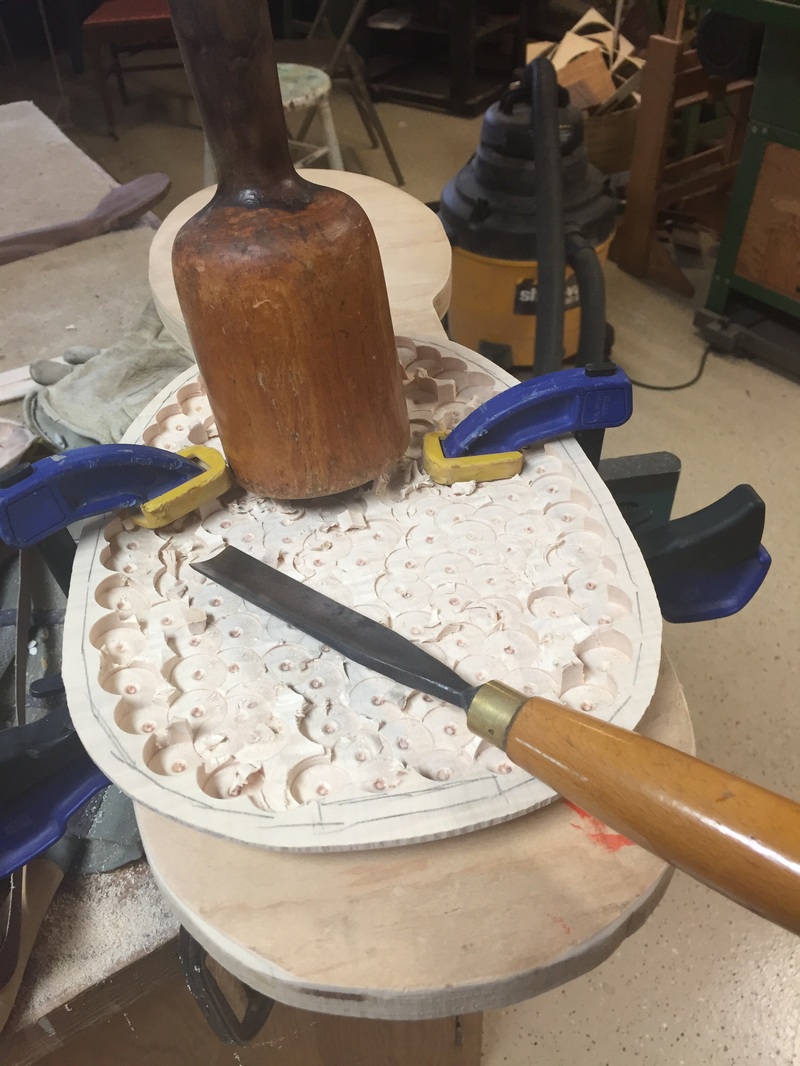
Now we have got to clean that rough mess up, with chisel and mallet
and then a disc grinder with 36 grit sandpaper

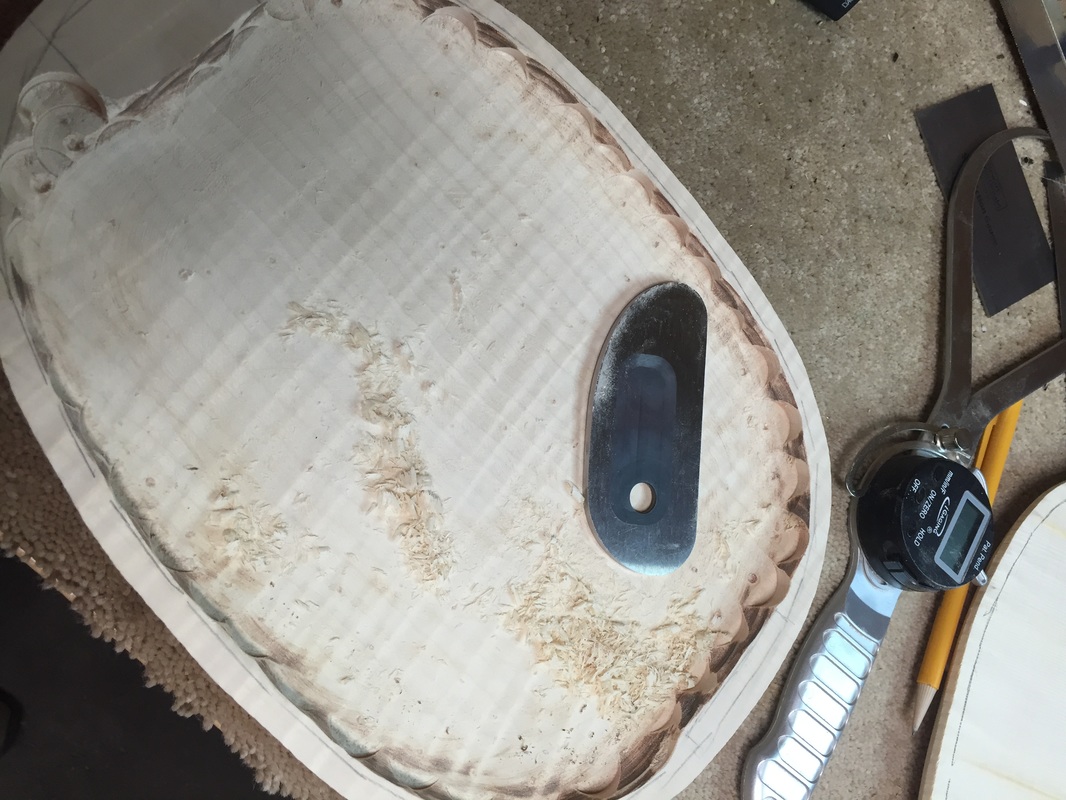
Then a little help with a good scraper
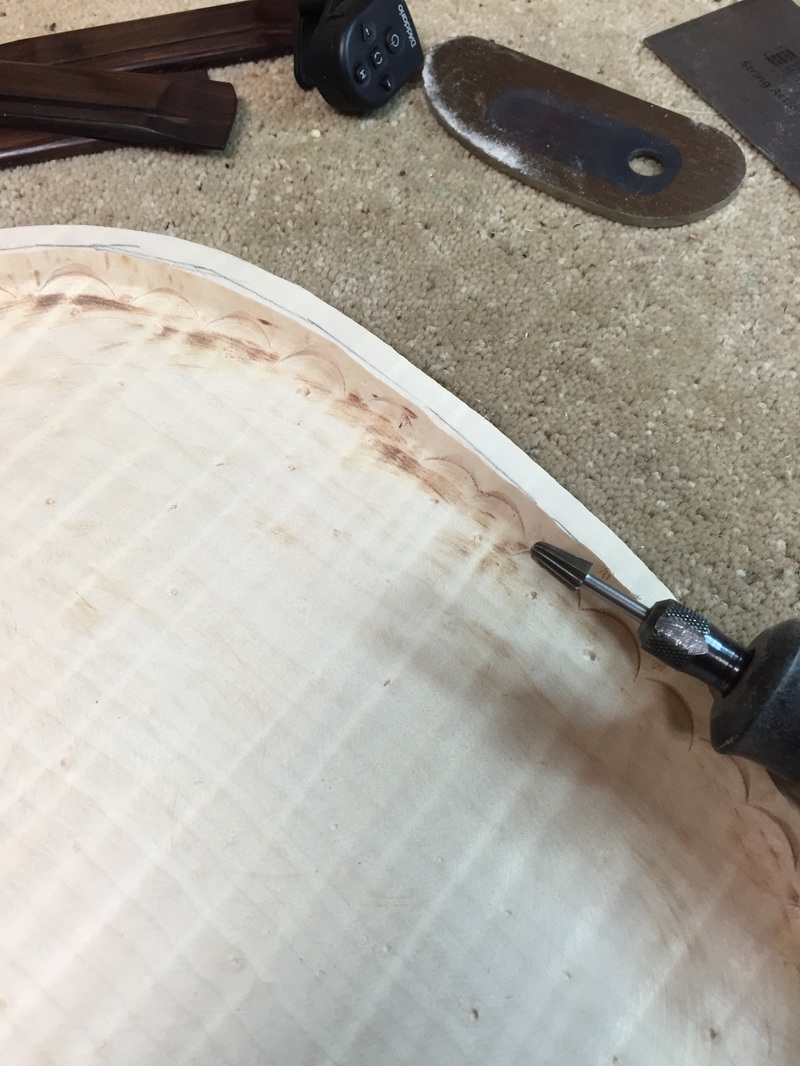
And then you want to clean up the edges with a Dremel mounted cutter.
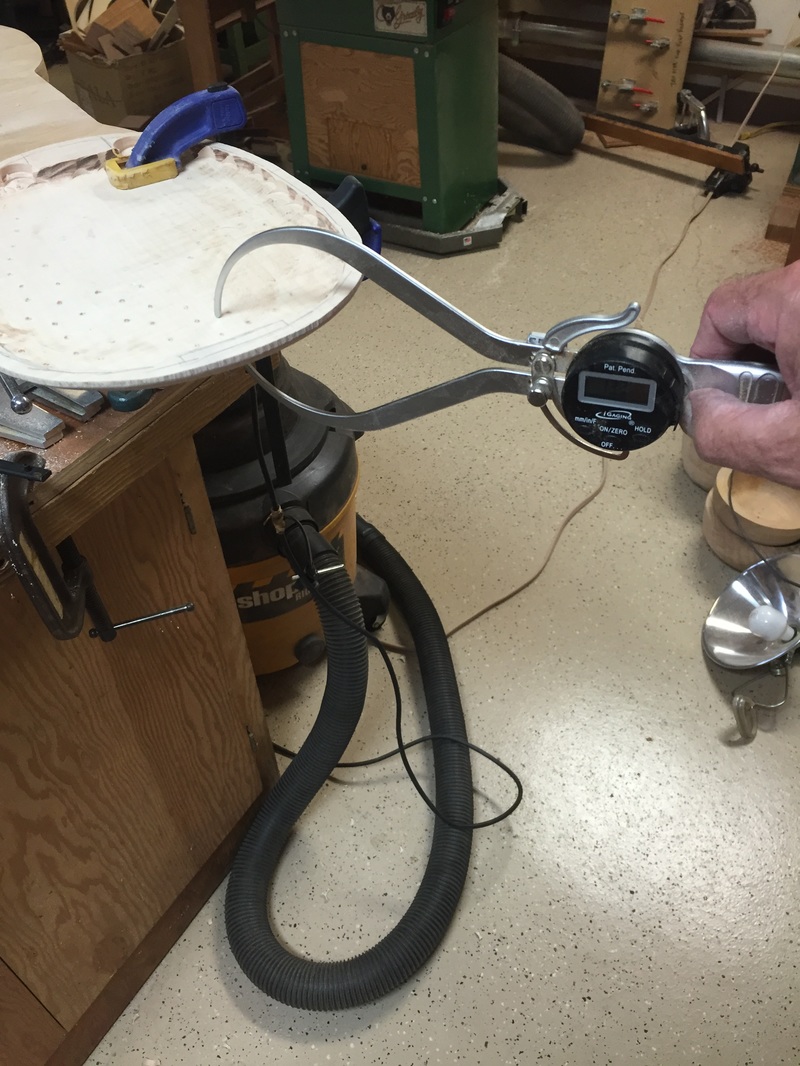
And finally you want to check the thickness. If you set the drill press correctly in the beginning, when the drill point holes are ground away you are at the thickness you planned for , just a hair under 1/8th of an inch. Final sanding on the top side will get you just where the tone is sweet and harp-like.