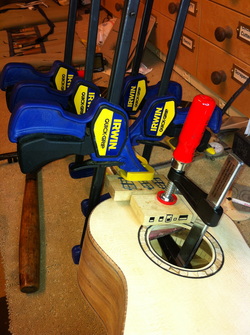
WITH THE FRETS filed down it is time to glue the board to the instrument. Now those little brad holes come into play. They were originally tapped into the neck during a dry run. Now the holes are there and the glued up fretboard is guided to the perfect location by the brads going once again into the holes in the neck. The brads are tapped in again to hold the fretboard from slipping and moving when clamp pressure is applied. Now with cauls to protect the board it is firmly clamped and glued to the neck. The "Blonde" got its neck first just cause she is so pretty.
Once the glue is set it will be time to do the final carving and sanding of the neck. Oh yes, I will pull the positioning brads from the very center of their fret groves and hammer in the missing frets.
Once the glue is set it will be time to do the final carving and sanding of the neck. Oh yes, I will pull the positioning brads from the very center of their fret groves and hammer in the missing frets.

ONCE the frets are installed on the fret boards, and the glue has had a chance to dry you must clip off the overhanging ends with a wire cutter and then file them down flush with the sides of the fretboard. There must be no feel of the fret ends as you play so be sure to take these ends down til you cannot feel them, and then sand/polish even further.
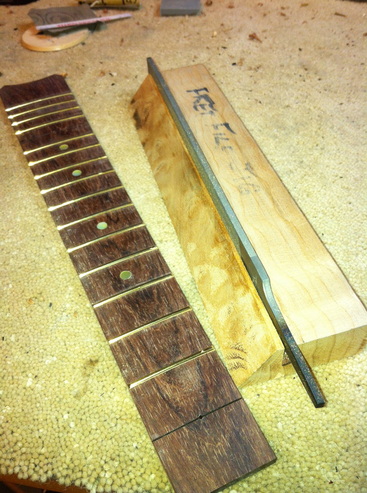
Here is the simple device I use to hold the file at the proper position as you pass the fret board past the file. Just a piece of wood with a 90 degree saw cut to hold the file,
Here is the simple device I use to hold the file at the proper position as you pass the fret board past the file. Just a piece of wood with a 90 degree saw cut to hold the file,

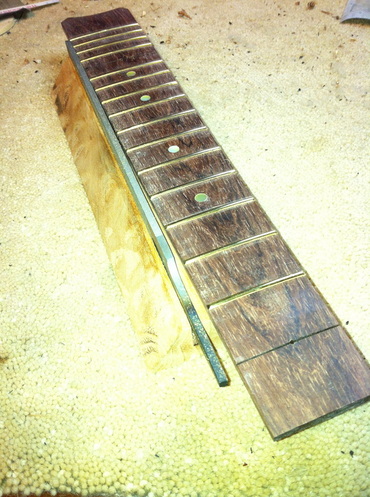
Here you see the fretboard in position to be drawn down the embedded file until the fret ends are perfectly flush with the wood, then you tilt the fretboard up to the 45 degree and file a nice rounded edge.
