What follows is a little tutorial on making the fret board. First it must be sawn down to shape from a larger chunk of Honduran Rosewood, Then sanded down to the proper thickness and sawn in two inch by ten inch size.
Now we must cut the grooves for the frets in exactly the correct place, and at exactly the proper depth. Here is how it is done
Now we must cut the grooves for the frets in exactly the correct place, and at exactly the proper depth. Here is how it is done
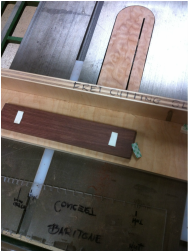 1. see the dark fret board with two pieces of double back tape attached. It rests on a special "sled" equipped with a bronze indexing point. The sled slides across the saw blade guided by the two white runners that fit in the table saw slots. The special narrow blade has been carefully set to cut exactly the correct depth into the fret board. the white rectangles are double sided tape that will hold the fret board to the plexiglas guide 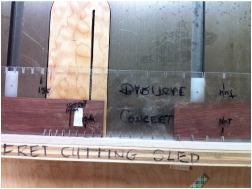 3. The saw blade is ready at the place for the first slot. note where the brass indexing pin is, inserted into the second hole of the guide. Now push the sled and the fret board forward one pass only to make the slot cut. then move the fret board and index guide one spot to the right to engage the second slot in the guide, and bring the sled back making the second slot cut. and so forth until--- 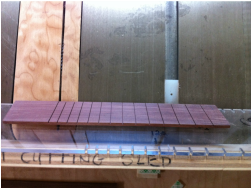 5. 6Now tip the fretboard and guide up and Voila!, you can see the 14 slots cut in exactly the right place. I used to measure and saw these slots by hand with a hand saw, Wow! this is the way to do it quick, accurately and easy. | 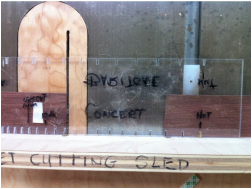 2. The fret-board is exactly 2 inches wide. It is led up against the special saw blade and the the plexiglass indexing guide dropped down on top, stuck to it by the tape. Note the bronze index point on the sled sitting in the groove in the guide marked nut. That means the saw blade is exactly where the nut will eventually be. Lets move the works up one notch on the index guide and we are ready to cut the slot for the first fret. 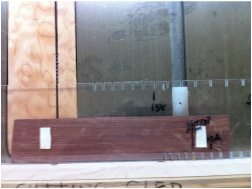 4. In this photo all the slots but one have been cut. The index pin is at the final, or 14th slot ready to cut the final and 14th slot in the fret board. Push the sled forward and you are done. 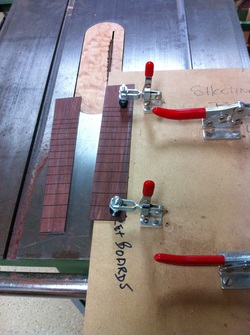 6. The final step is to carefully measure and mark each fret board and saw it to it's proper shape on this clamp sled. The clamps hold it in the exact position to saw the taper you desire. Note the sawn fretboard on the left. Next projecct will be to install mother of pearl dots. four on the top, and four on the side. |
