
FIRST WE MUST LEVEL THE GLUING SURFACE.
I clamp this big round and flat disc to my table saw table. The disc has 80 grit sand paper glued to it. I simply rub the back side of the uke on it until everything back there is perfectly flat and I can eventually glue the flat back to it and have no gaps. I measure from side to side frequently to be sure i am sanding evenly. Be sure that the butt plate and the neck piece are sanded in their entirety and match the sides and tentalones.
I clamp this big round and flat disc to my table saw table. The disc has 80 grit sand paper glued to it. I simply rub the back side of the uke on it until everything back there is perfectly flat and I can eventually glue the flat back to it and have no gaps. I measure from side to side frequently to be sure i am sanding evenly. Be sure that the butt plate and the neck piece are sanded in their entirety and match the sides and tentalones.
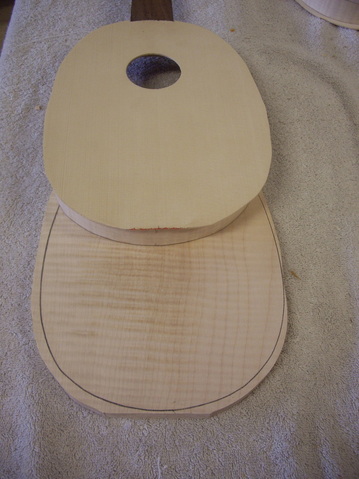
NOW THAT THE BACK IS LEVEL we can scribe a pencil line on the flat under surface of the back. This is the unique foot print of this uke, Be sure to number it as it will exactly fit not other.
Then take the back to the band saw and closely follow the pencil line cutting the back to almost final shape, now it is just a pencil line width too wide. Be sure to mark out the areas that the butt plate and neck piece will protrude into the interior. It is important that those areas be glued to the body.
Then take the back to the band saw and closely follow the pencil line cutting the back to almost final shape, now it is just a pencil line width too wide. Be sure to mark out the areas that the butt plate and neck piece will protrude into the interior. It is important that those areas be glued to the body.
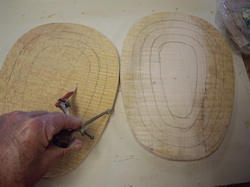
CONTOUR LINES are drawn on the back with a simple compass using the sharp end as a guide on the just sawn edge. Now you will have something to guide you as you carve the all important shape of the back.
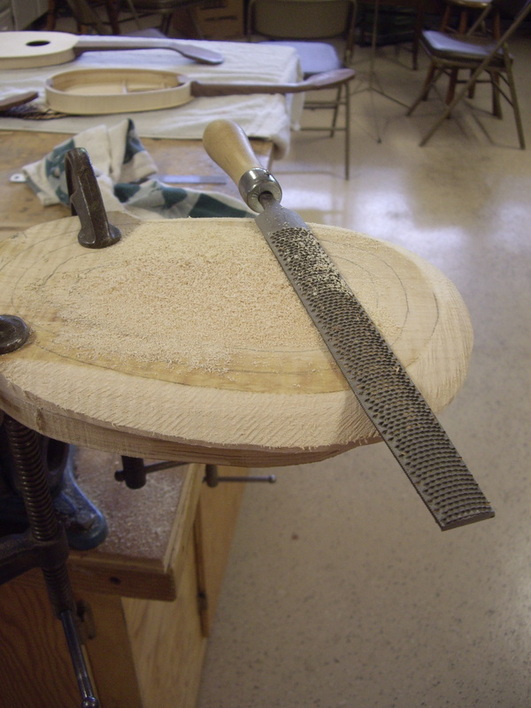
NOW THE WORK BEGINS. I have a killer set of three wood rasps, rough, medium and smooth and they really hog off wood. Using the Rough, I round off to the first contour line like this. The back is clamped onto a shaped work "hold" that is in turn clamped in my Parrot Vise, which is clamped to the lip of my shop work table.
I suppose you could do this with a power sander of some sort but wood working means the feel of a sharp tool shaping wood in your hands. I think this critical shaping needs to be done slowly with the senses all heightened. I love to see the shape evolve and change with every pass of the rasp.
I suppose you could do this with a power sander of some sort but wood working means the feel of a sharp tool shaping wood in your hands. I think this critical shaping needs to be done slowly with the senses all heightened. I love to see the shape evolve and change with every pass of the rasp.
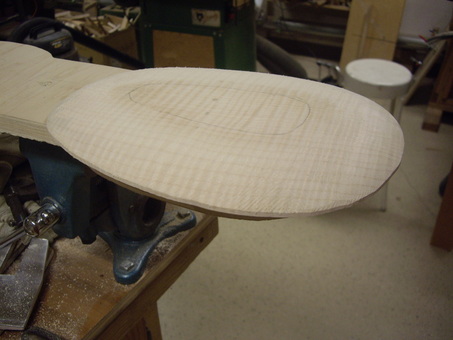
Continue rasping evenly to each contour line until the back looks about like this. This will be left in this rough stage as protection from dents and damage in the hollowing out process. After it is hollowed it will sanded with a bow sander to finish it to final thickness and then sanded to finish grade after it is glued to the body.
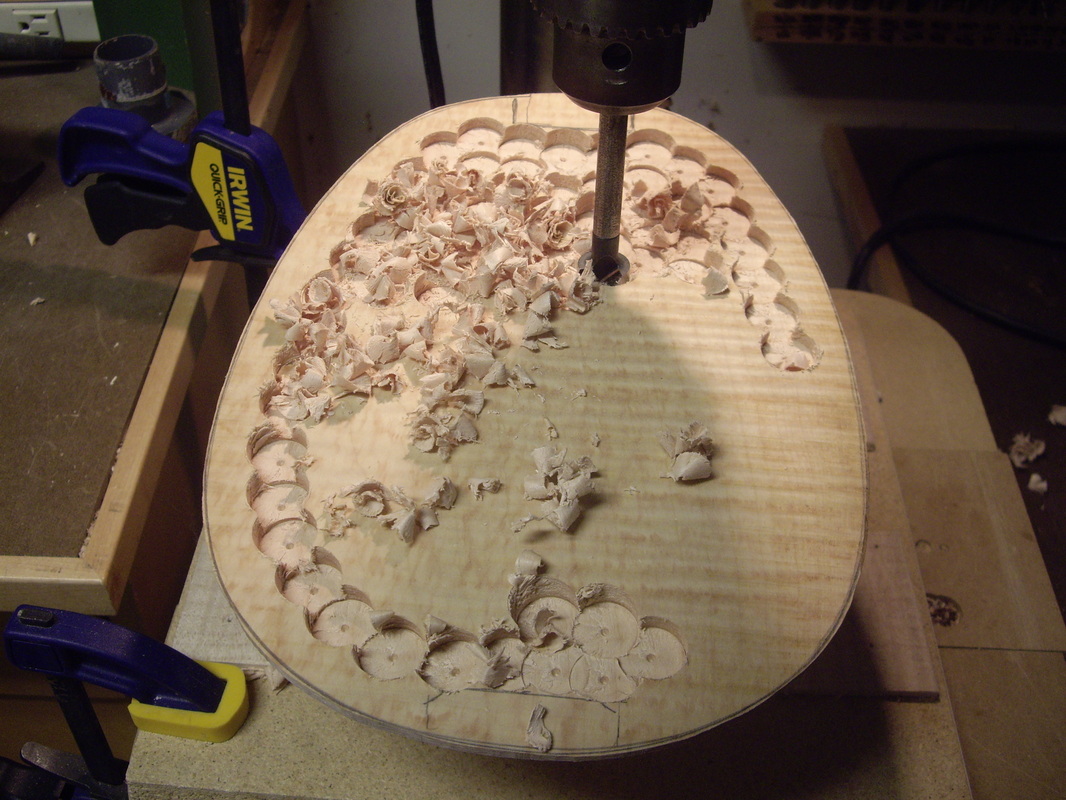
Hollow out the back using the drill press and a Forstner Bit. I have installed a 1 inch dowel vertically in the plywood base you see clamped to the drill press table. The dowel is gently rounded on top. The point of the Forstner Bit is lowered to just above the center of the vertical dowel and the drill press set to drill no further than that point. I you want your back to eventually be 3/16ths thick set the point exactly 3/16s above the dowel,
Now drill away, eliminating a majority of the wood in the back to the depth of the drill bit. Note that the point has penetrated the wood farther.
Now drill away, eliminating a majority of the wood in the back to the depth of the drill bit. Note that the point has penetrated the wood farther.
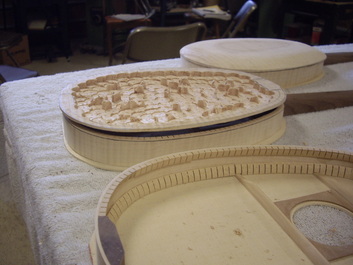
Here is the back, roughly hollowed out. Notice how the contour curves have been followed guided by the curve of the outside.
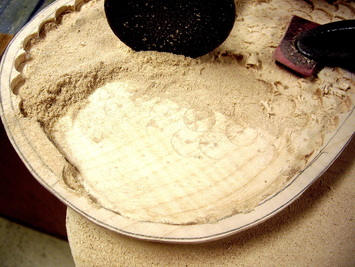
I use a sanding disc and a right angle drill motor to finish the job. 36 grit on a flexible rubber sanding disk does a quick job of grinding down the rough surface and taking the wood down to just the place where the point marks disappear. At that moment your back will be exactly the thickness that you had set the point from the top of the rounded dowel. You can also use the disc to carve to the edges as you see at the bottom of the picture. Final hand finishing with a curved scraper and other tools will make your back complete. Now don't forget to glue in your label before boxing up the uke.
