
I have been steadily working on the pinecones in the five days since writing about them.
Here I am finishing up the insides of the concave maple backs. Fiddleback maple is kind of tough to work but a scraper does a great job on it. Because the inside is concave I use a curved scraper to smooth things up and thin the back down a bit. I like it thin enough that you can feel the vibration on your belly when you play .
Here I am finishing up the insides of the concave maple backs. Fiddleback maple is kind of tough to work but a scraper does a great job on it. Because the inside is concave I use a curved scraper to smooth things up and thin the back down a bit. I like it thin enough that you can feel the vibration on your belly when you play .
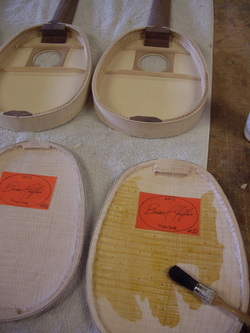
A PROTECTIVE COAT OF SHELLAC; I paint a coat of shellac on the interiors of all of my ukes. It makes no sense to me to have one side of a piece of wood protected from the vagaries of humidity changes and the other side unprotected. The "Pinecones" are such perfect travel ukes that who knows what atmospheric changes they will see in their lifetimes. If you move an instrument from the moist humidity of the tropics to the dry heat of the desert and then further dry it out in an air conditioned hotel room you are asking for trouble. That is why I think shellac on both sides is important, it will reduce that humidity exchange. An added tip. Keep your uke in its case when traveling through different atmospheric conditions.
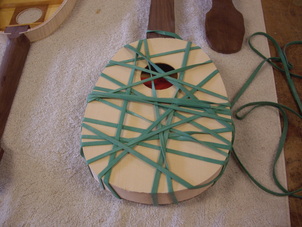
TIME TO BOX THEM UP They have a coat of shellac top , bottom and sides, the labels are glued on , it is time to box them up. I paint a thin coat of glue on the edge of the concave bottom and on the tentalone surface and carefully join them . Perfect matches every time if you have been careful in marking lines. They are bound together tightly by these huge rubber bands that work as powerful clamps on the curved surface of the back.
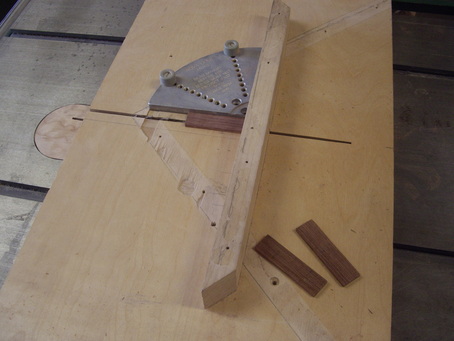
BRIDGES & FRET BOARDS; While the glue is drying I ripped a long piece of Honduran Rosewood to width and cut out the bridges and fret boards. Now the groove that holds the bone saddle must be cut into the bridge .
I do this on a saw sled that slides in the two grooves of my table saw. It is really handy to do small work on and is made to cut a perfect 90 degrees. When ripping a groove I place a guide with a 90 degree angle on the sled .
With the blade set at the proper height It is easy to hold the wood down with a protective pad and move the entire sled through to make the cut.
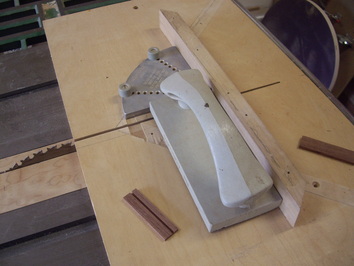
PROTECT YOUR FINGERS; Using his rubber bottomed device I am able to safely hold the wood down with one hand, the angled guide with the other and with my thumbs push the sled through the blade. The grooved bridge is seen at the lower left and there is no blood on the saw blade. Thank goodness!
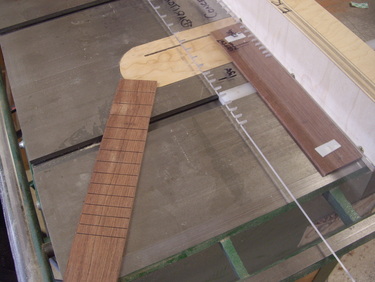
CUTTING SLOTS FOR THE FRETS; Doing this by hand is a tedious difficult job, easy to make mistakes and ruin a fretboard. Using a notched template is the way to go. It requires a special saw blade and a plastic template but it saves incredible amounts of time and is perfectly accurate assuring proper intonation of your instrument. A bronze pin inserted in the wooden sled indexes with the groove on the template. The fret board is attached to the template with double backed tape. You simply make a cut and move template and wood to the next notch and cut again.
This template has notches for concerts on one side and sopranos on the other side.
This template has notches for concerts on one side and sopranos on the other side.
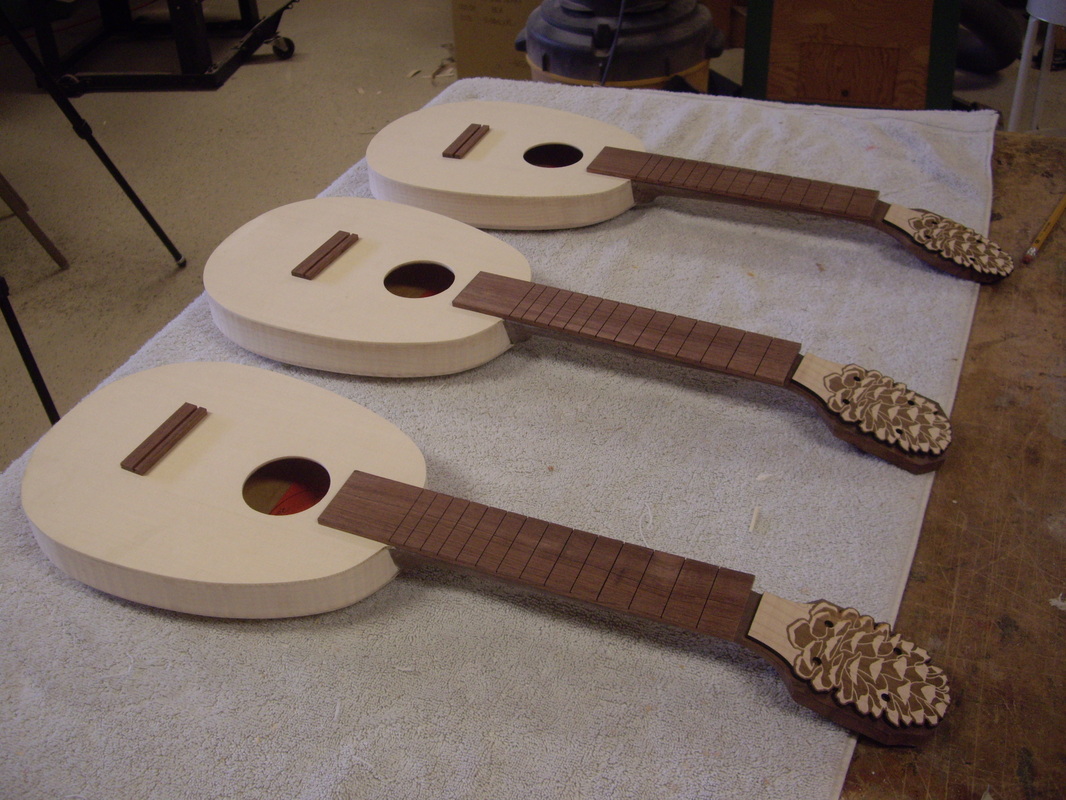
NOW THEY ARE BEGINNING TO LOOK LIKE PINECONES: With fretboards, bridges and peghead plates laid in approximate positions they are beginning to show their stuff. I think today I will taper the boards and install dots and frets. Once I get the fretboards on I can install the peg head plates and do the final shaping of the neck.
