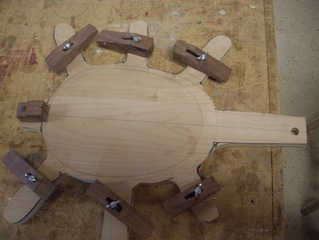
This is the assembly jig I made to fit both sizes of the Pinecone Ukes, Soprano and Concert.
I call it the TORTOISE for reasons that must be obvious to the viewer. It works like a charm. The side is clamped at the rear to the stationary block, fitted into the neck slot and then adjusted and held by the adjustable side position holders made of scrap walnut using wing nuts for tightening
I call it the TORTOISE for reasons that must be obvious to the viewer. It works like a charm. The side is clamped at the rear to the stationary block, fitted into the neck slot and then adjusted and held by the adjustable side position holders made of scrap walnut using wing nuts for tightening
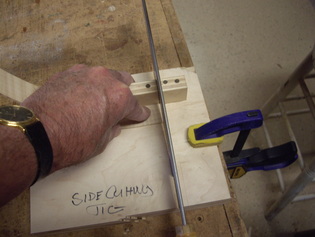
The sides always need to be trimmed to their proper length. It's pretty easy to eyeball the proper length by dry fitting the sides in the "Tortoise". Then there is even a simple jig to help cut a straight end as you trim to length. I am using one of the great oriental "draw saws" here. I find they work much better than our "Push" saws for most uses.
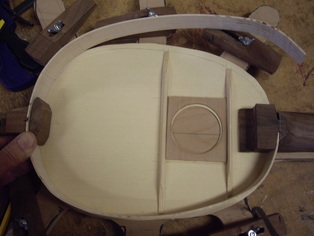
Ah! that cut was just right. with the side fully inserted into the neck slot and my thumb holding the center line on the side exactly on the center of the butt plate the side sits perfectly on the drawn lines on the inside of the soundboard. Now if we can have the same luck on the other side.
Oh boy!, It fits perfectly. It is time to glue it up. You don't want to put glue in the neck slots, you want that to be adjustable for a bit. Prepare a couple of very thin wedges to drive into that slot from inside the instrument to be sure the side pushes firmly against the neck slot so that there will be no crack visible when you finish the instrument. Drop a little glue on the wedges once you have them installed.
Put glue on the outside of the butt plate and a very thin bead of glue on the underside of the side to be installed. Don't use too much. It is tough to clean up after it dries and you want a flat surface on the inside because you will soon be glueing tentalones there.
Put glue on the outside of the butt plate and a very thin bead of glue on the underside of the side to be installed. Don't use too much. It is tough to clean up after it dries and you want a flat surface on the inside because you will soon be glueing tentalones there.
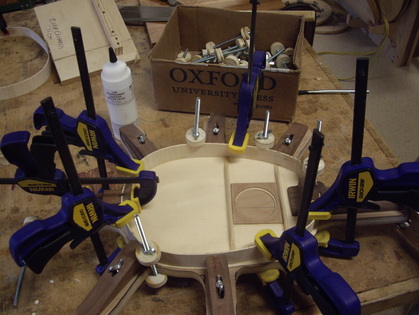
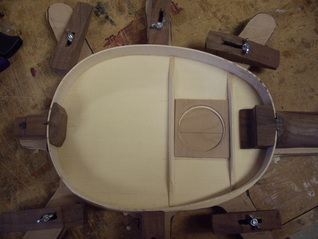
All glued up and clamped down. The Tortoise holds are tightened in position holding the side on the proper shape lines.The clamps will press it to the sound board until the glue sets. I am headed for lunch. After lunch I will repeat the process on #32. Hope it fits as well as this one did.
Then I must manufacture some tentalones. I will be needing them shortly.
Incidently, those spool clamps are easy to make. With a hole saw cut a bunch of donuts from good plywood. Buy lots of round head bolts and wing nuts and put them together. Not as handy as these great Irwin clamps but they don't cost much either. Nice to have some Irwin clamps around to do the heavy lifting.
