I LOVE A DAY I CAN CALL MY OWN!! Spent the morning practicing the ukulele and researching at the Archive for the book I am going to write. After lunch I spent the whole afternoon in the workshop amid the sawdust and wood chips, Made a few too as you shall see.
First task was sanding the backing off of the rosette of the Redwood top. Here you can see it entering the sander, and the spalted maple is beginning to show although the white spruce backing is still evident.
a couple more passes through the sander ought to do the trick.
a couple more passes through the sander ought to do the trick.
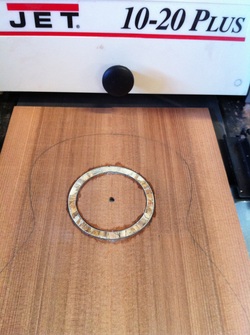
Sure enough it did. And now before I sand the top down further I will put the top back on the pivot pin and fire up the router to cut out the sound hole.
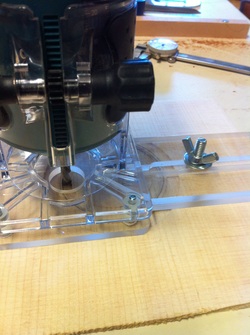
Here is the circle cutting device shown connected over the pivot pin with the down spiral cutting bit poised over a "practice" piece that I find helpful in planning the cut and being sure I am doing it right.
By loosening the wing nut you can widen or narrow the circle that the bit will cut while rotating on the pivot pin. Not very high tech, but it works fine.
By loosening the wing nut you can widen or narrow the circle that the bit will cut while rotating on the pivot pin. Not very high tech, but it works fine.
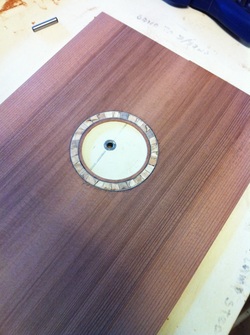
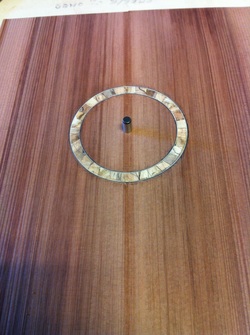
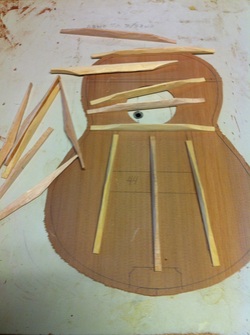
There we are, the rosette installed, the sound hole cut out, now all I need to do is sand this top down to .80 or .85. I am pleased, the wood is beautiful, The rosette compliments it, the black white purfling is subtle and works. I guess it is time to move on to the next project, the bracing.
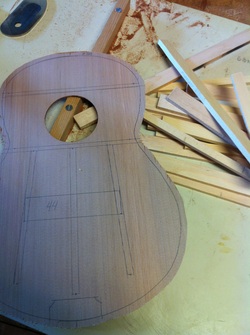
On the backside of the top I have drawn in the locations of the bracing. It takes a lot of lumber to make the bracing for three tenor ukuleles. You can see here the pile of spruce I have assembled to make the braces. I use Sitka Spruce, it is unbelievably strong, it is stiff but vibrates well and of course it is excellent tone wood.
It is crucial that the spruce used for braces be quarter sawn so that the wood grain rises vertically from the top providing maximum strength in the thinnest and lightest possible configuration.
It is crucial that the spruce used for braces be quarter sawn so that the wood grain rises vertically from the top providing maximum strength in the thinnest and lightest possible configuration.

I saw the spruce just a hair over 1/4 inch wide, then run it through the thickness sander set at 1/4 inch. Now I have each piece smooth and exactly 1/4 inch wide. then it is sawn to the proper lengths.
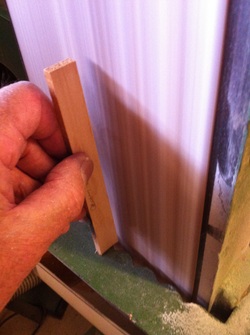
The surface that glues to the instrument must be perfectly flat and so I take each piece to the sander to smooth and straighten it
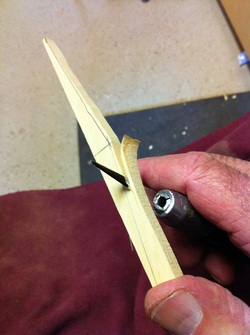
And now the whittling begins. all those years sitting on the beach at San Juan Island whittling cedar taught me to love the simple use of a sharp knife and willing wood. I rough carve each brace and then sand it smooth and ready to glue to the instrument. I have left the old jack knife for the super sharp exacto blades. They do a great job.
It took about 1 hour to whittle the braces for three tenor tops. It will be a few more minutes of sanding and I will be able to glue these to the tops.
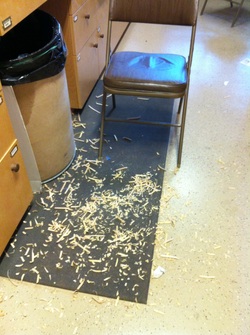
Here is the comfortable whittling chair, and the pile of shavings, The end of a pleasant afternoon in the workshop.
