Jon Dale is a ukulele building friend of mine on the east coast. He invented a marvelous circle routing device that is mated to a Dremel tool and a Stewart McDonald routing guide. It allows you to route various sized circles in wood simply by choosing a numbered hole as a pivot point
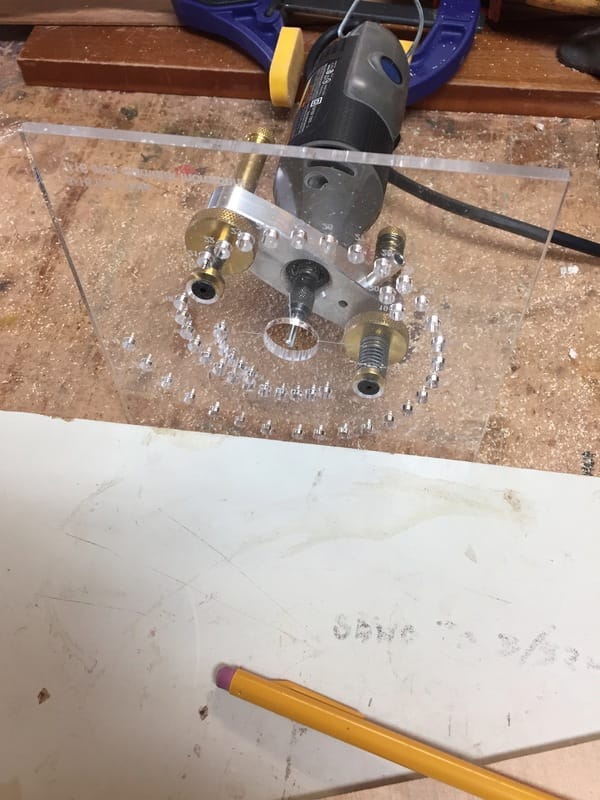
The acrylic plate attaches to the Stew. Mac. guide with machine screws. The dremel screws into that as shown. Each hole in the plate can become the pivot point for the cutter in the Dremel tool .
to increase the diameter of the circle 1 16th of an inch you simple impale the pivot shaft through the next highest numbered hole. Each hole changes the diameter of the routed circle by 1/16th
to increase the diameter of the circle 1 16th of an inch you simple impale the pivot shaft through the next highest numbered hole. Each hole changes the diameter of the routed circle by 1/16th
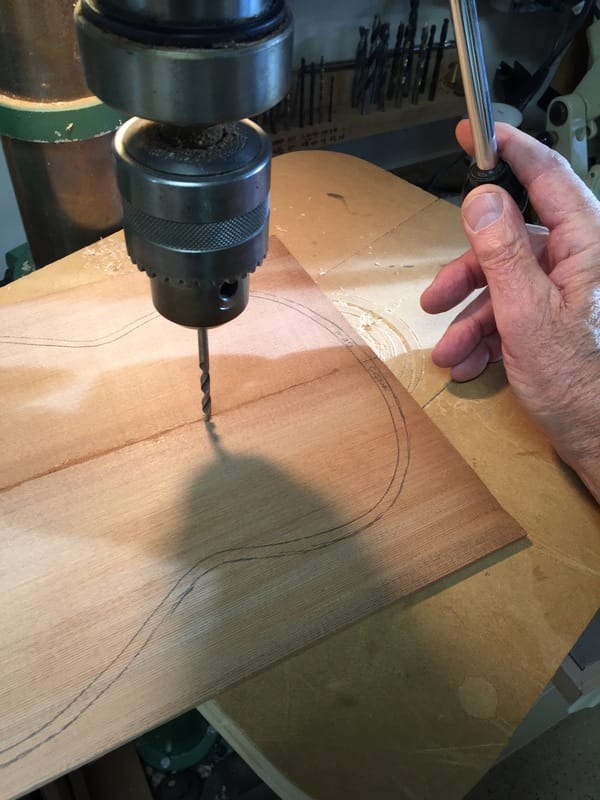
It must begin with a 3/16th hole drilled into the piece you want to route the circle in. Here is one of the tenor tops in preparation for routing the sound hole and the channel for the decorative rosette around it.
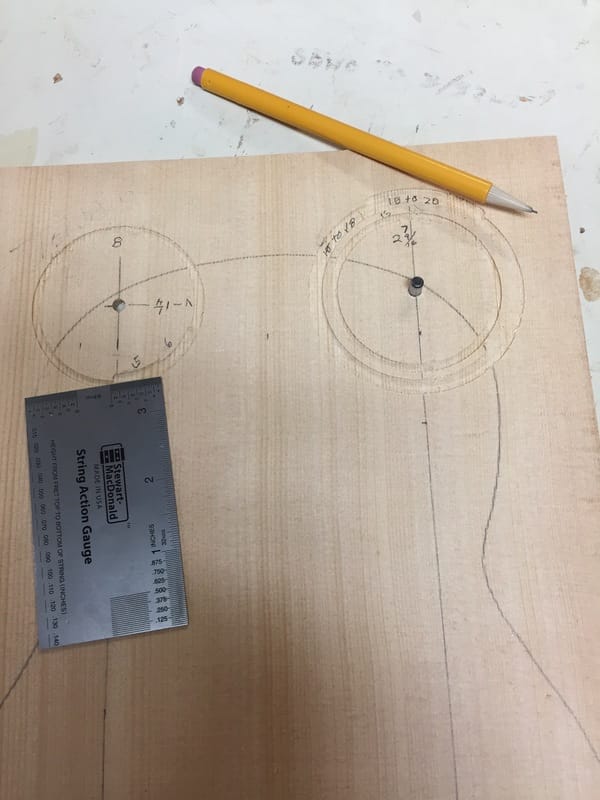
First I wanted to do a little experimenting on a spare piece of Sitka Spruce. I found that if I were to put the # 7 hole over the pivot pin set into my working board I would route a
circle with a diameter of 2.5 inches, Just what I wanted for the sound hole of my four tenors. Then by cutting another circle with the 15th hole as pivot point I would leave the proper separation between sound hole and the rosette. Then by cutting circles at #18 hole and #20 hole I would have cut just the groove wanted for the rosette trimmed by some thin purfling. Now to apply it to the real thing.
circle with a diameter of 2.5 inches, Just what I wanted for the sound hole of my four tenors. Then by cutting another circle with the 15th hole as pivot point I would leave the proper separation between sound hole and the rosette. Then by cutting circles at #18 hole and #20 hole I would have cut just the groove wanted for the rosette trimmed by some thin purfling. Now to apply it to the real thing.
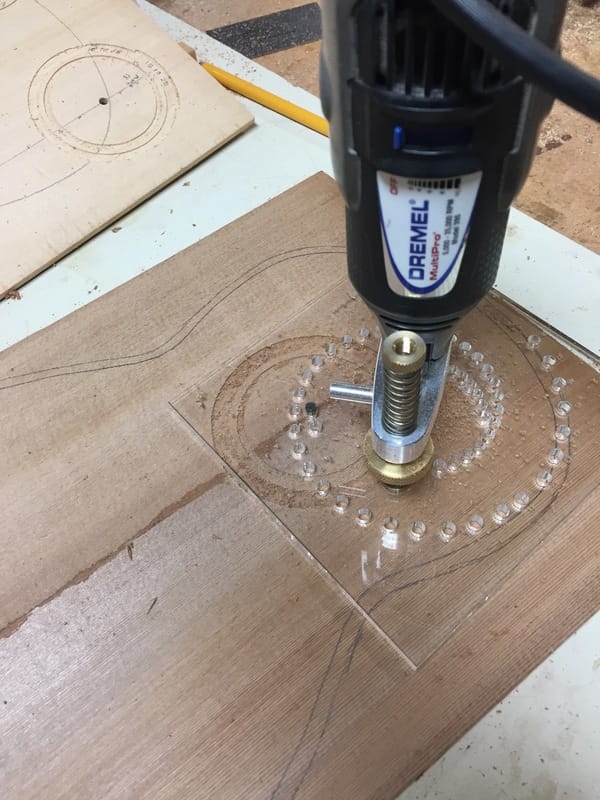
It worked perfectly. The diameters were just what I wanted. The circles perfectly round, but I had done this on a top that I had not sanded down adequately. I determined to now sand the tops down to their final level using 18o grit paper. Then I re-routed this top in order to get enough depth in the groove to properly hold the rosette. Now there was one final problem. The sound hole grove had to be cut much deeper so that by sanding the back of the soundboard, it would be released and fall out.
I was able to simply lower the cutter on the dremel, Put the whole works back into hole #7 and my cut was deepened to almost through the wood. I will free the sound hole by sanding down the back of the piece.
I was able to simply lower the cutter on the dremel, Put the whole works back into hole #7 and my cut was deepened to almost through the wood. I will free the sound hole by sanding down the back of the piece.

So here is the final resuult. All four soundboards are successfully cut. Next challenge, making the rosette from small bits of spalted maple, cut it into the right sized circle and glue it into the shallow grove. Then the top will be thinned to .8o by anding the back. That will release the sound hole too.
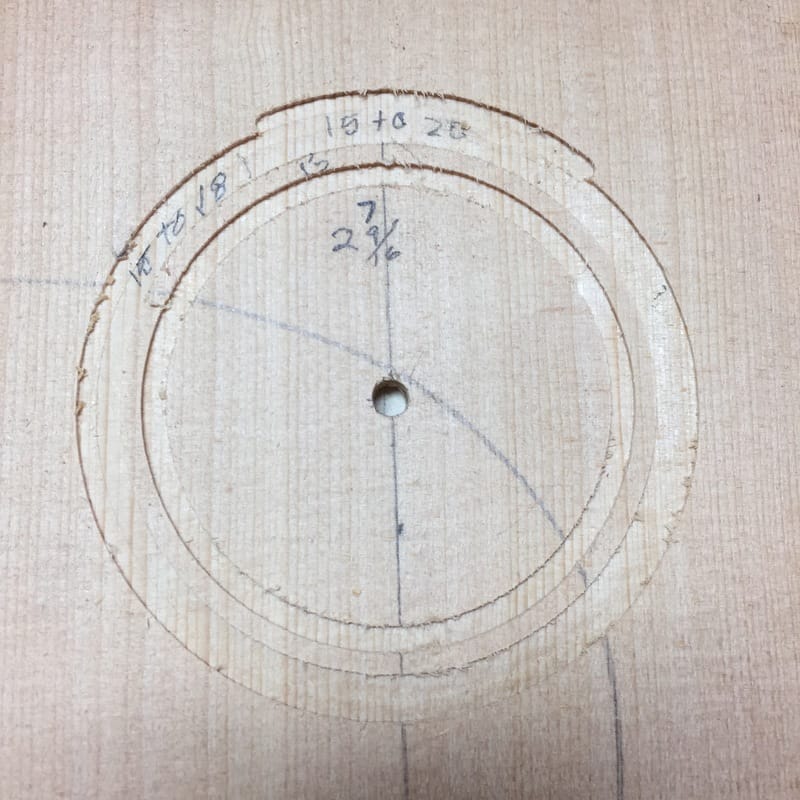
Here was the successful practice piece. the recipe, the sound hole cut out uses hole #7. Then the rosette groove uses #s 15, 18 and 20. How easy is that with this incredilble tool? What a brilliant idea. Thanks Jon Dale
