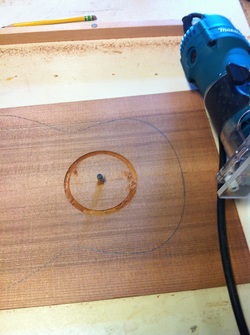
But I did have time to set up the router and make the first cut for the rosette. You must carefully set the circle making device so that it rotates on this pin inserted in the table and cuts at exactly the right place. This cut shown is the inner cut. I finally figured out the way to do this accurately. I saved my experimental piece from the last time. It has the center hole and the grooves cut around it just where I want them.
I simply set the router on the pivot pin and move the cutter to the inner edge of the earlier made cut. Then I knew it was set right. Tighten the wing nut locking the router in that position and you can repeat the edge. now put the redwood top back on the pin, set the router and its circle guide on the protruding pin and cut the circle.
I simply set the router on the pivot pin and move the cutter to the inner edge of the earlier made cut. Then I knew it was set right. Tighten the wing nut locking the router in that position and you can repeat the edge. now put the redwood top back on the pin, set the router and its circle guide on the protruding pin and cut the circle.
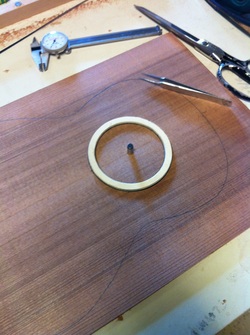
Once the inner circle is cut reset the router circle guide, using the old experimental piece back on the pivot pin. You loosen the wing nut on the guide and slide the router bit to the outside of the desired groove. Now put the redwood top back on the pin and cut the circle wider than before. You will find you have copied that original groove perfectly. The prepared rosette is place in the groove upside down as shown here. When glued in, you will sand the spruce backing entirely off of the rosette, and you will sand the entire top . Now you will find the rozette perfectly flush with the top of the tone wood and you will see the ring of spalted maple for the first time as the sander reveals it after repeated passings.
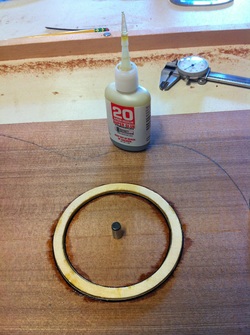
I carefully inserted lengths of "white/black fabric purfling entirely around both the inner and outer circumference of the rosette carefully pushing it down around the ring til it was fully seated in the tiny gap between the redwood and the rosette. This time I used some .20 purling that should add a nice touch. Once it is in place I flood the margins with super glue. I used the Amber color hoping to use it as a gap filler anywhere where their might be a tiny gap. The glue will wick down under the rosette and not only glue it permanently to the Redwood but secure the purfling as well.
In the morning I can run this through the thickness sander to bring it down flush. Then I will re-set the hole guide on the router and cut the sound hole almost through the Redwood top. A few trips through the sander and the hole will fall free, the super glue will be sanded off and the finished rosette will appear.
In the morning I can run this through the thickness sander to bring it down flush. Then I will re-set the hole guide on the router and cut the sound hole almost through the Redwood top. A few trips through the sander and the hole will fall free, the super glue will be sanded off and the finished rosette will appear.
