MAKING parts and pieces is interesting and fun, but nothing matches the fun of finally assembling an instrument. Today I attached sides and saw the these three tenors become three dimensional for the first time. The preparatory work is behind me and now we will see the instruments born.
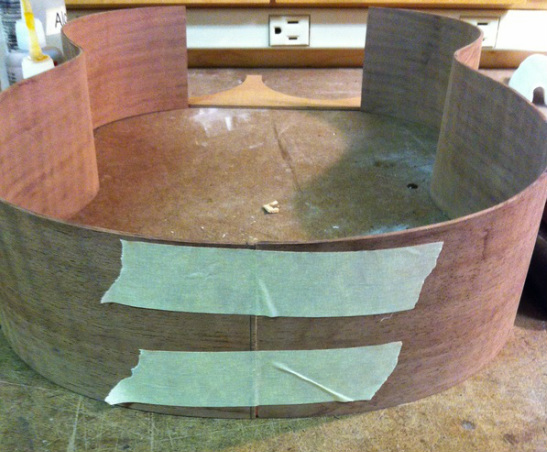
The first step is to carefully trim the sides to the proper length. The sides as they are prepared to be bent are always longer than necessary. That gives you a bit of latitude when bending. To install, you first saw off about 5/8ths of an inch at the head end. It usually takes a couple of cuts to get it the right length, a tentative experimental first cut, and then a final cut that is just right and will fit into the groove cut into the neck. Then you determine how much to cut off of the tail, Usually about an inch. When both sides are trimmed properly the ends are taped together thusly.
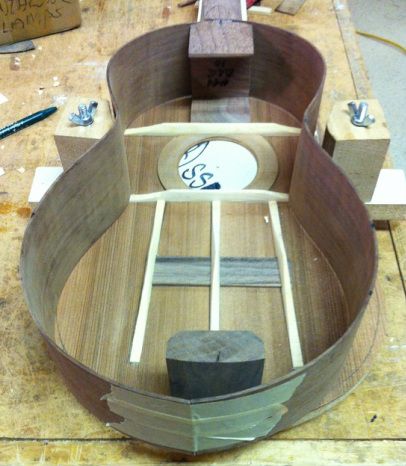
Now the sides are taken to the installation jig where the top is resting, clamped to the long neck of the jig to hold it in place. The two head ends of the sides are inserted into those slots in the neck piece and the taped together tail ends are brought up to the center of the walnut butt block. If all looks in order, glue is applied to the bottom edge of the sides where they touch the redwood top, the butt block and sides are carefully glued and clamped to each other using a concave caul that matches the curve on the butt block.
Tighten up the clamp on the butt block centering the taped ends on the centerline of the butt block- then push in and tighten the movable waist braces on the installation jig using the wing nuts (one of which is seen on the right)
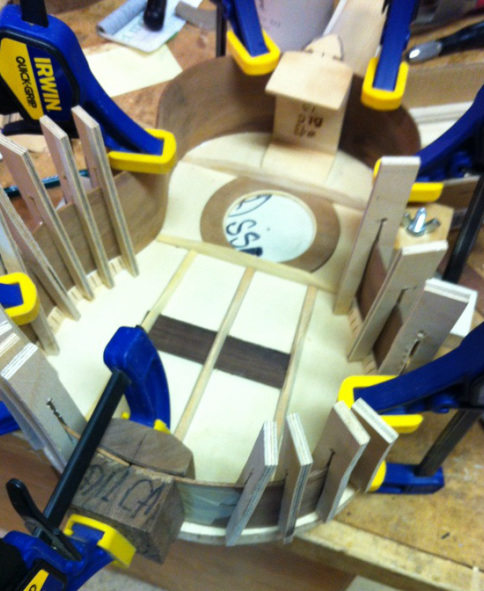
This will push the sides right into the drawn lines on the inside of the top. Now tighten the Irwin clamps all around, holding the glued edges tightly to the top. Now it is time for the tentalones. They are carefully placed with glue on two sides and held tightly against the top and the sides by these simple clamps made by cutting 1/8th inch plywood. When all of this dries your sides will be securely attached to the top. Warning, do not glue the sides into that slot at the head. You will want to place some little tightening wedges in that slot to assure a tight visible joint at the neck.
This will push the sides right into the drawn lines on the inside of the top. Now tighten the Irwin clamps all around, holding the glued edges tightly to the top. Now it is time for the tentalones. They are carefully placed with glue on two sides and held tightly against the top and the sides by these simple clamps made by cutting 1/8th inch plywood. When all of this dries your sides will be securely attached to the top. Warning, do not glue the sides into that slot at the head. You will want to place some little tightening wedges in that slot to assure a tight visible joint at the neck.
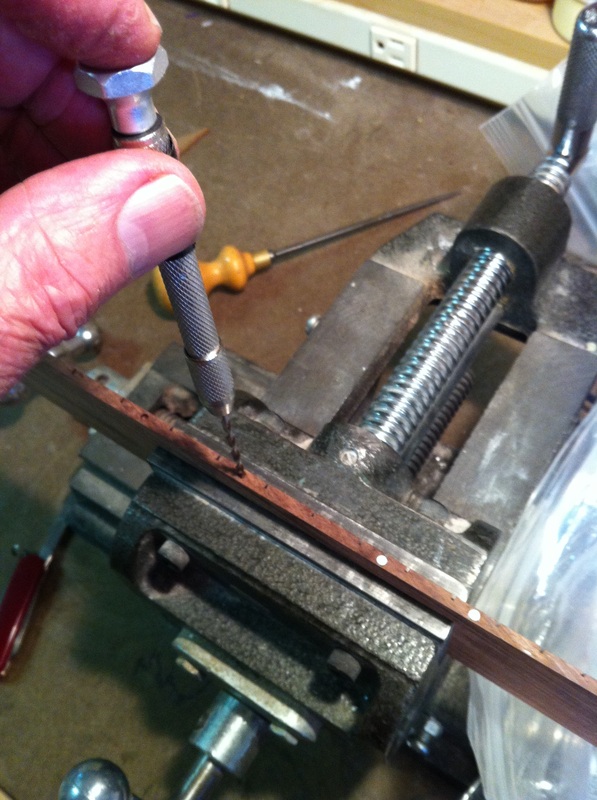
Since I have only one installation jig and I had to wait for the glue to dry, I turned to another little task, installing the side dots on the fret boards. These are mother of pearl dots that I buy from Hana Lima Ai. You recall I delayed doing this task until I had radiused these fretboards. There is very little margin for error in drilling these holes on the narrow edge. You need to find the center, mark it gently with a sharp awl (seen in the background) and then very carefully drill by hand a hole that will just accept a bit of glue and a MOP dot. It is not hard to do but takes a little time and concentration. Anyhow, the day's total was five fret boards dotted and two ukes sided. In the morning I will glued the sides on the final uke and then begin working on attaching the back. We will have those tenors "boxed" up in no time.


